Service Manual (KLZ1000C) — page 279 of 762
Crankshaft/Transmission › Connecting Rod Removal
Text on this page
CRANKSHAFT/TRANSMISSION 9-15
Crankshaft and Connecting Rods
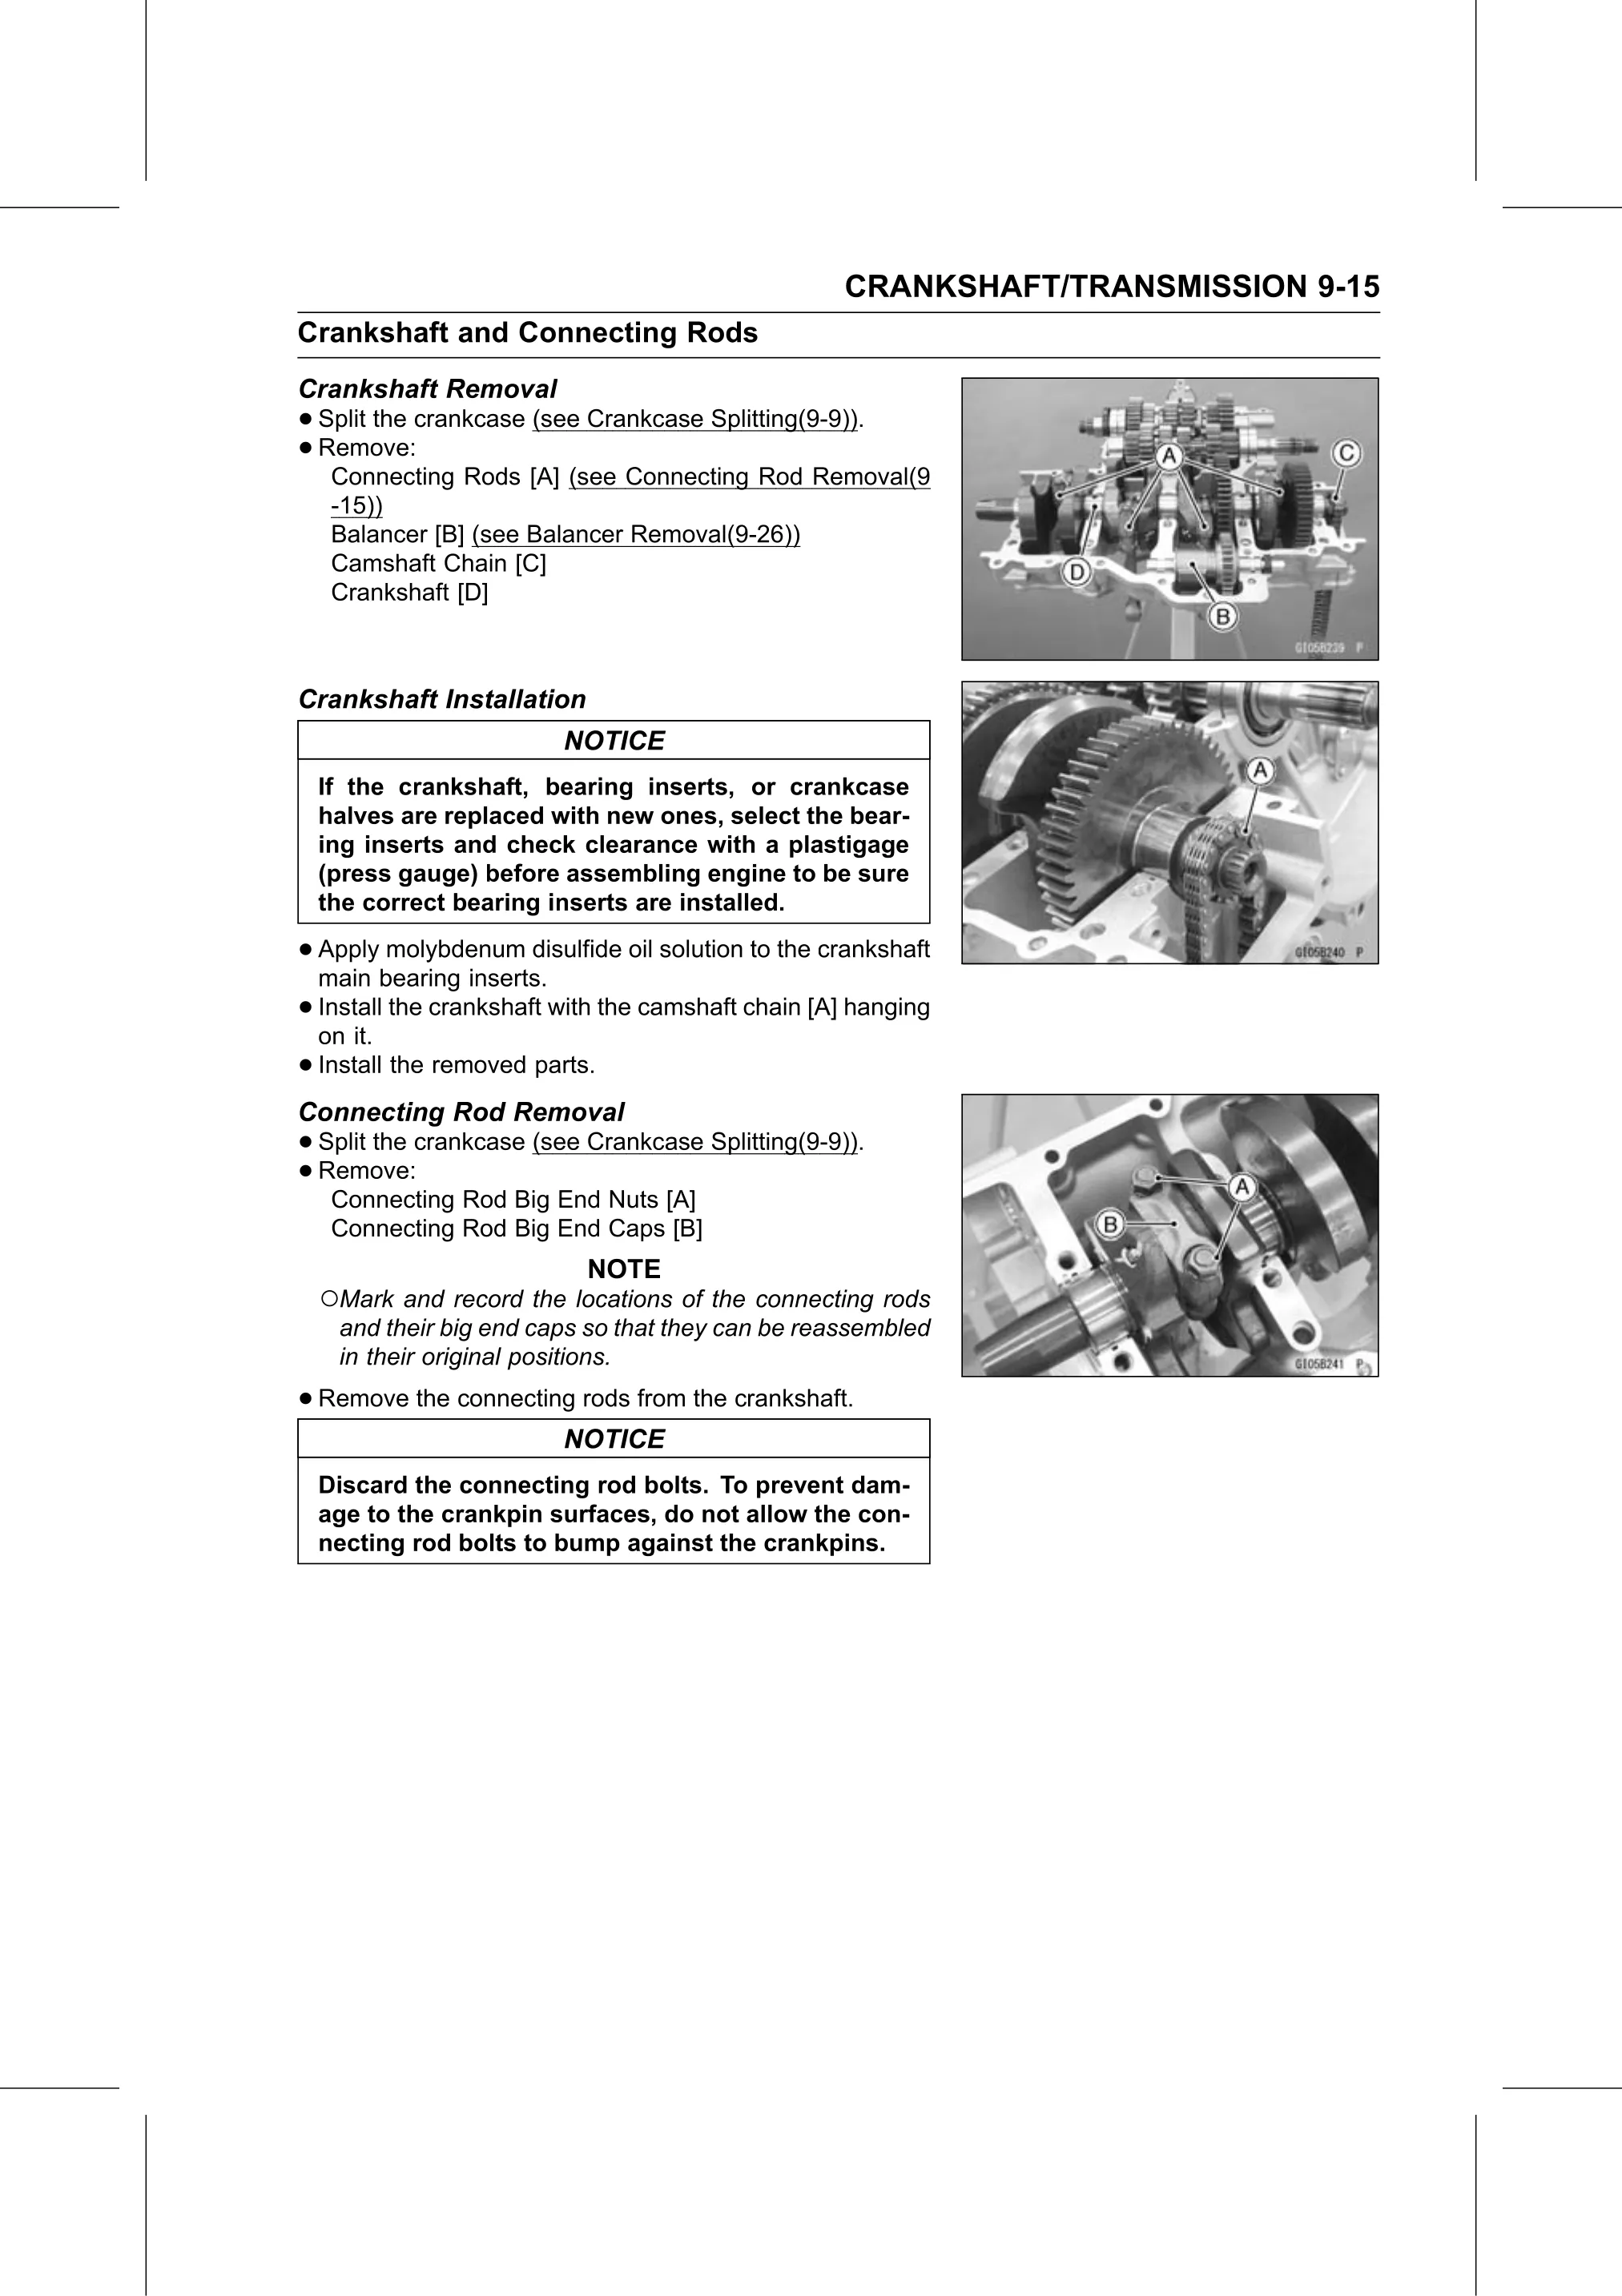
Crankshaft Removal
• Split the crankcase (see Crankcase Splitting(9-9)).
• Remove:
   Connecting Rods [A] (see Connecting Rod Removal(9
   -15))
   Balancer [B] (see Balancer Removal(9-26))
   Camshaft Chain [C]
   Crankshaft [D]

Crankshaft Installation
                         NOTICE
  If the crankshaft, bearing inserts, or crankcase
  halves are replaced with new ones, select the bear-
  ing inserts and check clearance with a plastigage
  (press gauge) before assembling engine to be sure
  the correct bearing inserts are installed.

• Apply   molybdenum disulfide oil solution to the crankshaft
  main bearing inserts.
• Install
  on it.
          the crankshaft with the camshaft chain [A] hanging

• Install the removed parts.
Connecting Rod Removal
• Split the crankcase (see Crankcase Splitting(9-9)).
• Connecting Rod Big End Nuts [A]
  Remove:

   Connecting Rod Big End Caps [B]
                           NOTE
  ○Mark and record the locations of the connecting rods
   and their big end caps so that they can be reassembled
   in their original positions.

• Remove the connecting rods from the crankshaft.
                         NOTICE
  Discard the connecting rod bolts. To prevent dam-
  age to the crankpin surfaces, do not allow the con-
  necting rod bolts to bump against the crankpins.