Service Manual (KLZ1000C) — page 353 of 762
Brakes › Front Caliper Installation
Text on this page
BRAKES 12-13
Calipers
Front Caliper Removal
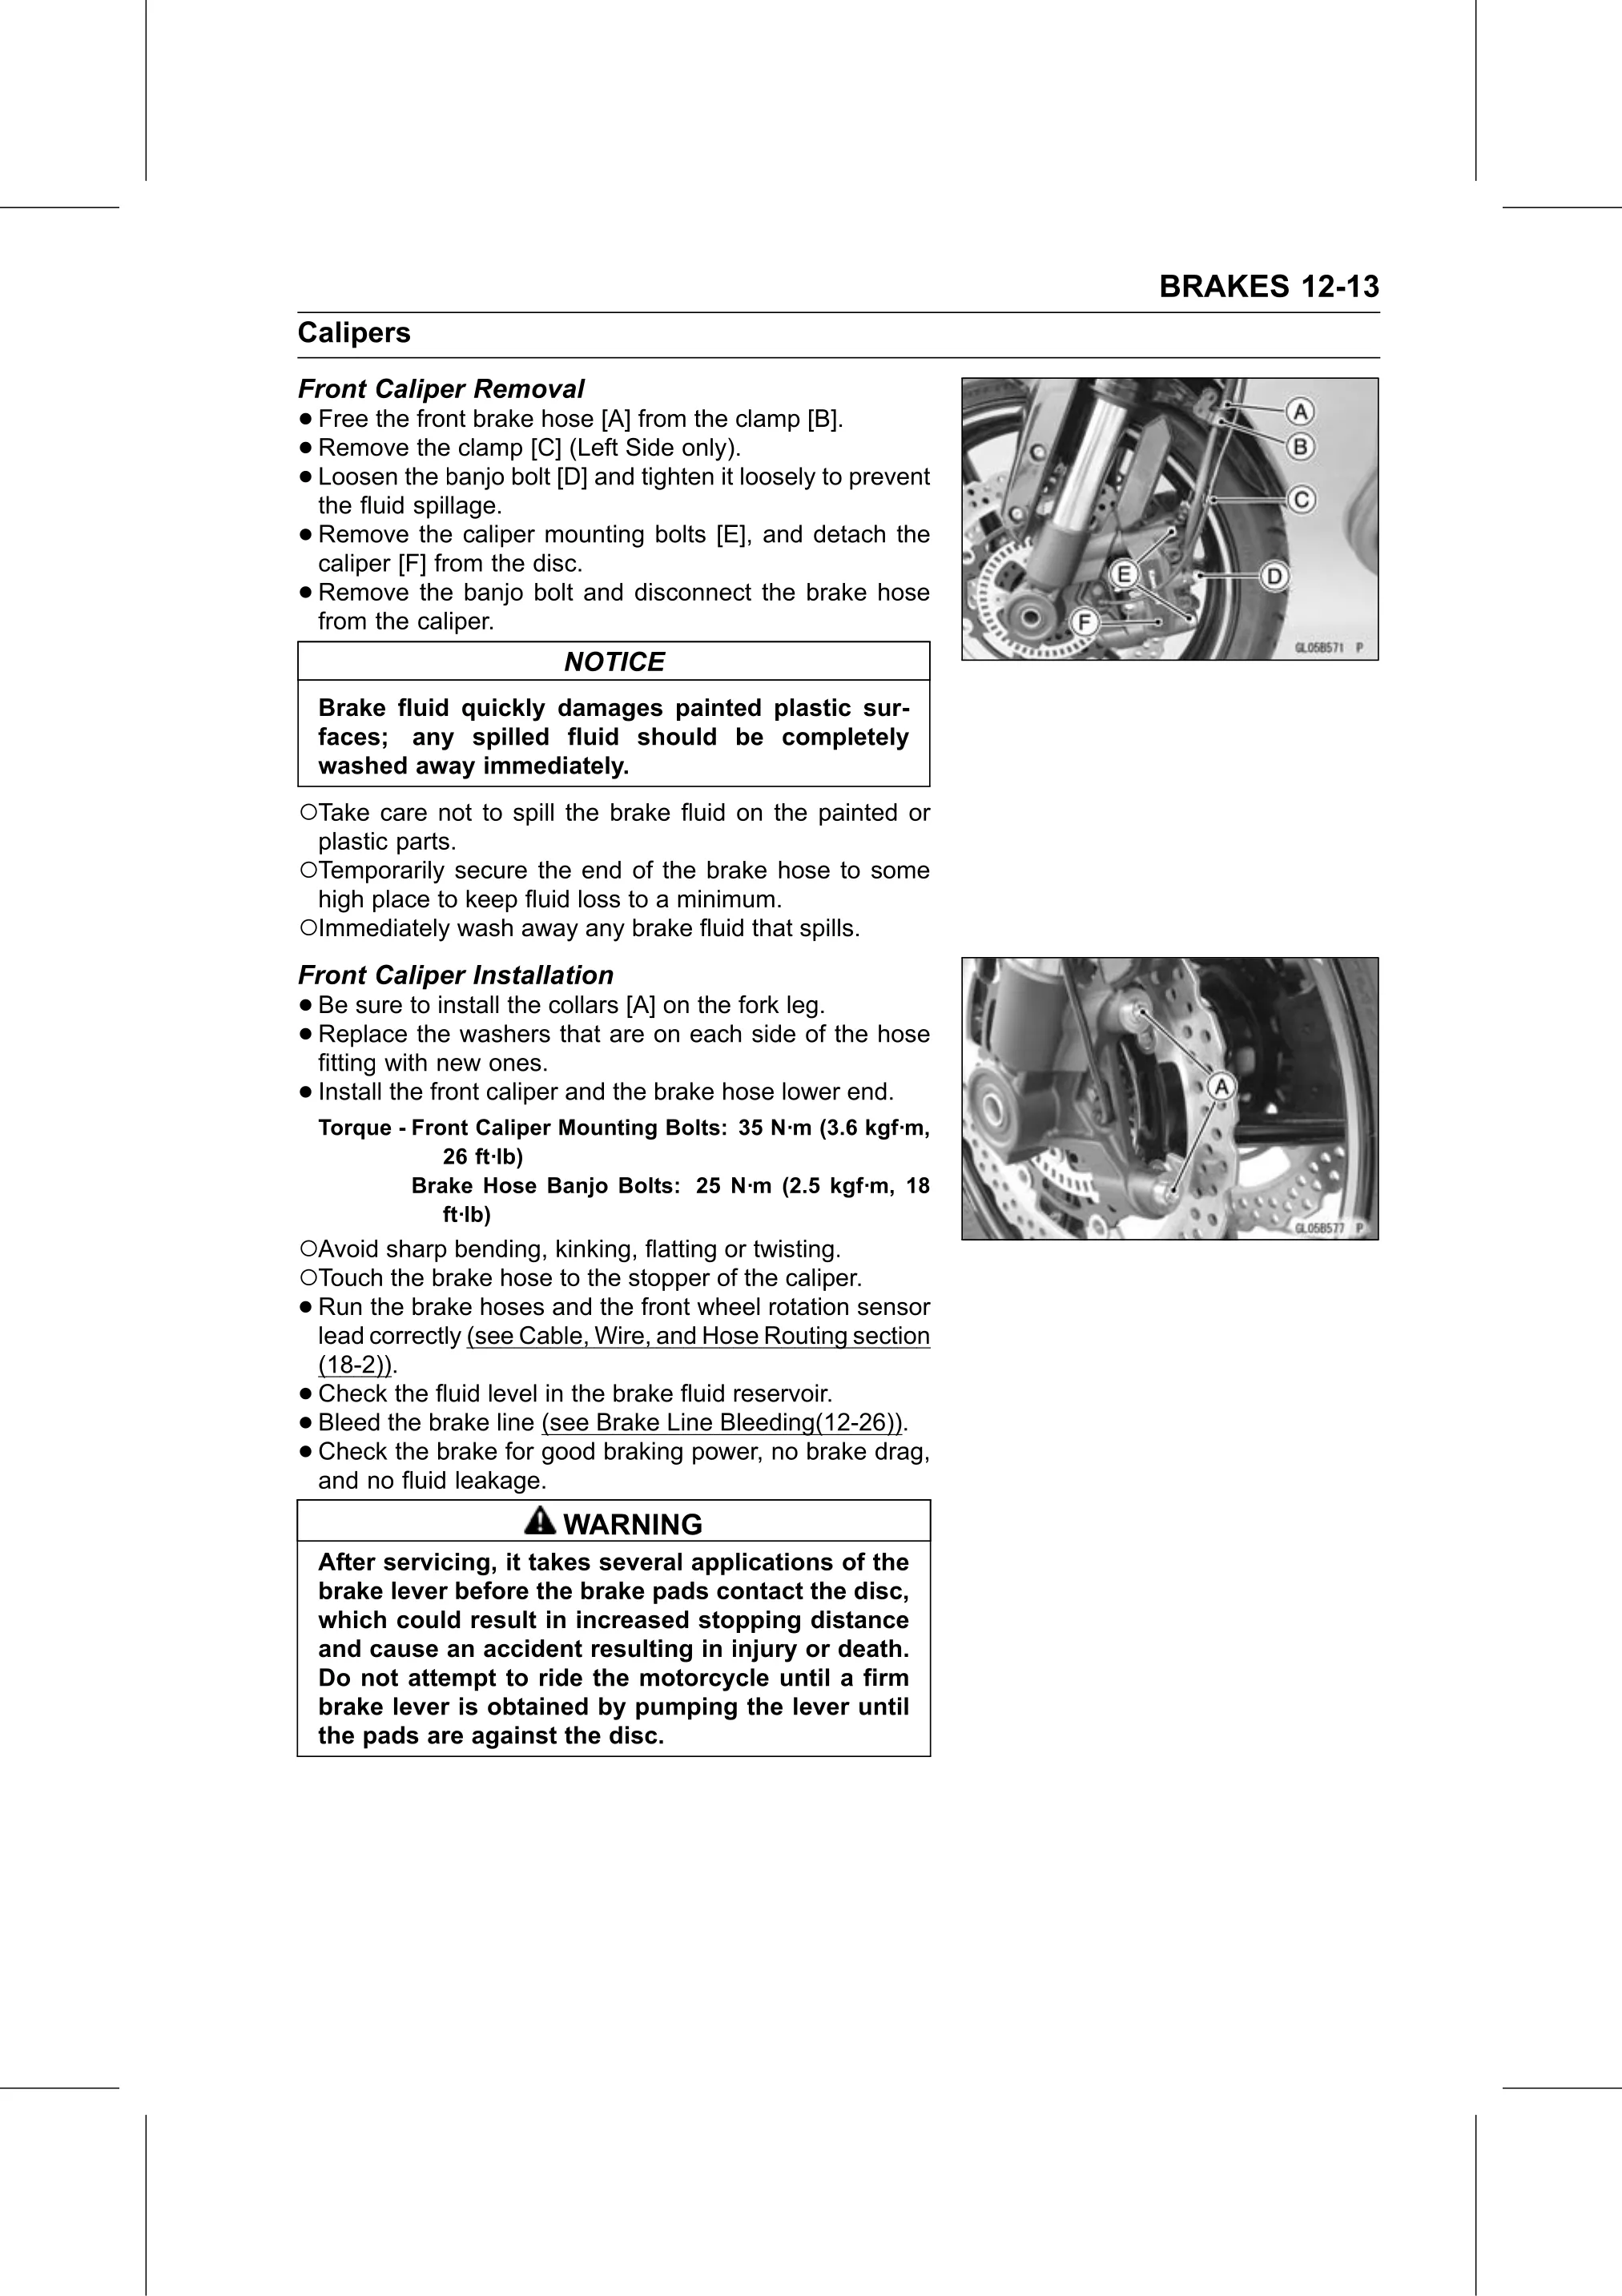
• Free  the front brake hose [A] from the clamp [B].
• Remove    the clamp [C] (Left Side only).
• the fluid spillage.
  Loosen   the banjo bolt [D] and tighten it loosely to prevent

• Remove     the caliper mounting bolts [E], and detach the
  caliper [F] from the disc.
• Remove     the banjo bolt and disconnect the brake hose
  from the caliper.
                          NOTICE
    Brake fluid quickly damages painted plastic sur-
    faces; any spilled fluid should be completely
    washed away immediately.
○Take care not to spill the brake fluid on the painted or
    plastic parts.
○Temporarily secure the end of the brake hose to some
 high place to keep fluid loss to a minimum.
○Immediately wash away any brake fluid that spills.
Front Caliper Installation
• Be   sure to install the collars [A] on the fork leg.
• Replace    the washers that are on each side of the hose
  fitting with new ones.
• Install the front caliper and the brake hose lower end.
    Torque - Front Caliper Mounting Bolts: 35 N·m (3.6 kgf·m,
                26 ft·lb)
             Brake Hose Banjo Bolts: 25 N·m (2.5 kgf·m, 18
                ft·lb)
○Avoid sharp bending, kinking, flatting or twisting.
○Touch the brake hose to the stopper of the caliper.
• Run  the brake hoses and the front wheel rotation sensor
  lead correctly (see Cable, Wire, and Hose Routing section
    (18-2)).
•   Check the fluid level in the brake fluid reservoir.
•   Bleed the brake line (see Brake Line Bleeding(12-26)).
•   Check the brake for good braking power, no brake drag,
    and no fluid leakage.
                          WARNING
    After servicing, it takes several applications of the
    brake lever before the brake pads contact the disc,
    which could result in increased stopping distance
    and cause an accident resulting in injury or death.
    Do not attempt to ride the motorcycle until a firm
    brake lever is obtained by pumping the lever until
    the pads are against the disc.