Service Manual — page 42 of 715
Periodic Maintenance › Engine Vacuum Synchronization Inspection
Text on this page
2-20 PERIODIC MAINTENANCE
Periodic Maintenance Procedures
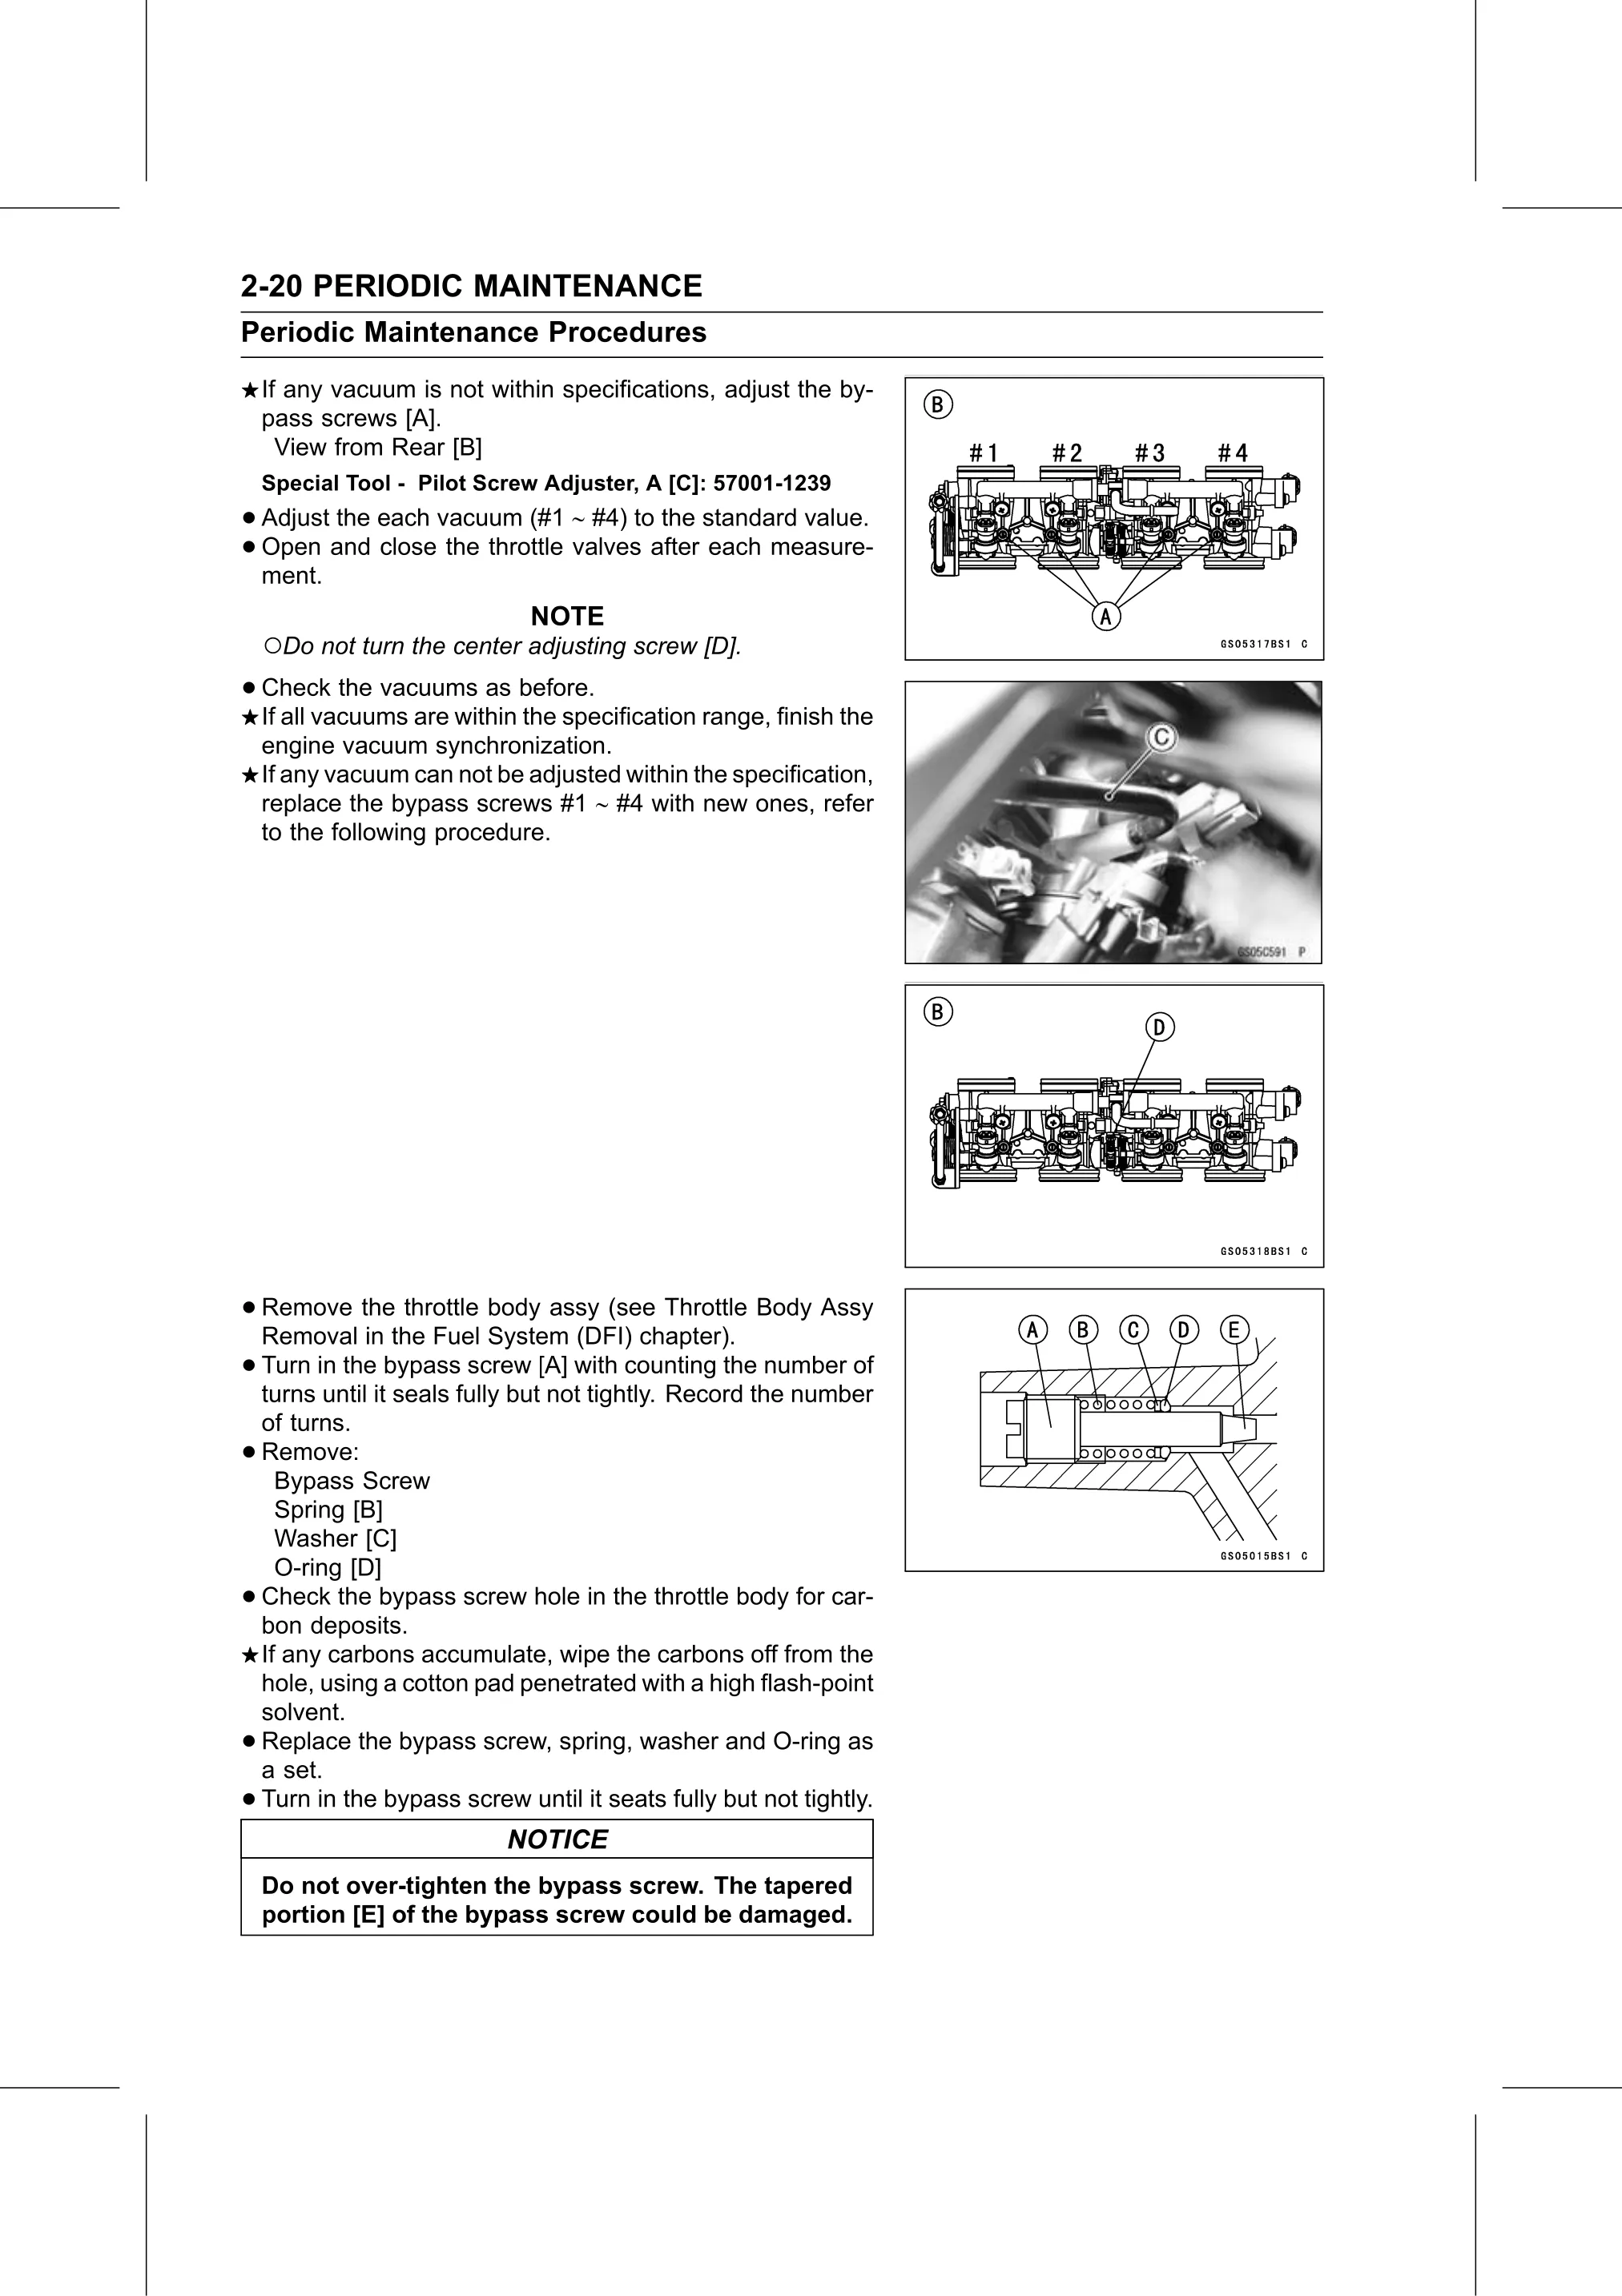
    If any vacuum is not within specifications, adjust the by-
    pass screws [A].
      View from Rear [B]
    Special Tool - Pilot Screw Adjuster, A [C]: 57001-1239
• Adjust the each vacuum (#1 ∼ #4) to the standard value.
• ment. close the throttle valves after each measure-
  Open   and

                               NOTE
    ○Do not turn the center adjusting screw [D].
• Check    the vacuums as before.
  If all vacuums are within the specification range, finish the
    engine vacuum synchronization.
    If any vacuum can not be adjusted within the specification,
    replace the bypass screws #1 ∼ #4 with new ones, refer
    to the following procedure.

• Remove    the throttle body assy (see Throttle Body Assy
  Removal in the Fuel System (DFI) chapter).
• Turn in the bypass screw [A] with counting the number of
  turns until it seals fully but not tightly. Record the number
    of turns.
•   Remove:
      Bypass Screw
      Spring [B]
      Washer [C]
      O-ring [D]
•   Check the bypass screw hole in the throttle body for car-
    bon deposits.
    If any carbons accumulate, wipe the carbons off from the
    hole, using a cotton pad penetrated with a high flash-point
    solvent.
•   Replace the bypass screw, spring, washer and O-ring as
    a set.
•   Turn in the bypass screw until it seats fully but not tightly.
                            NOTICE
    Do not over-tighten the bypass screw. The tapered
    portion [E] of the bypass screw could be damaged.