Service Manual — page 307 of 715
Clutch › Release Shaft Removal
Text on this page
CLUTCH 6-9
Clutch Cover
Clutch Cover Removal
• Drain the engine oil (see Engine Oil Change in the Peri-
  odic Maintenance chapter).
• Remove:
   Right Lower Fairing (see Lower Fairing Removal in the
     Frame chapter)
     Clutch Cable Lower End (see Clutch Cable Removal)
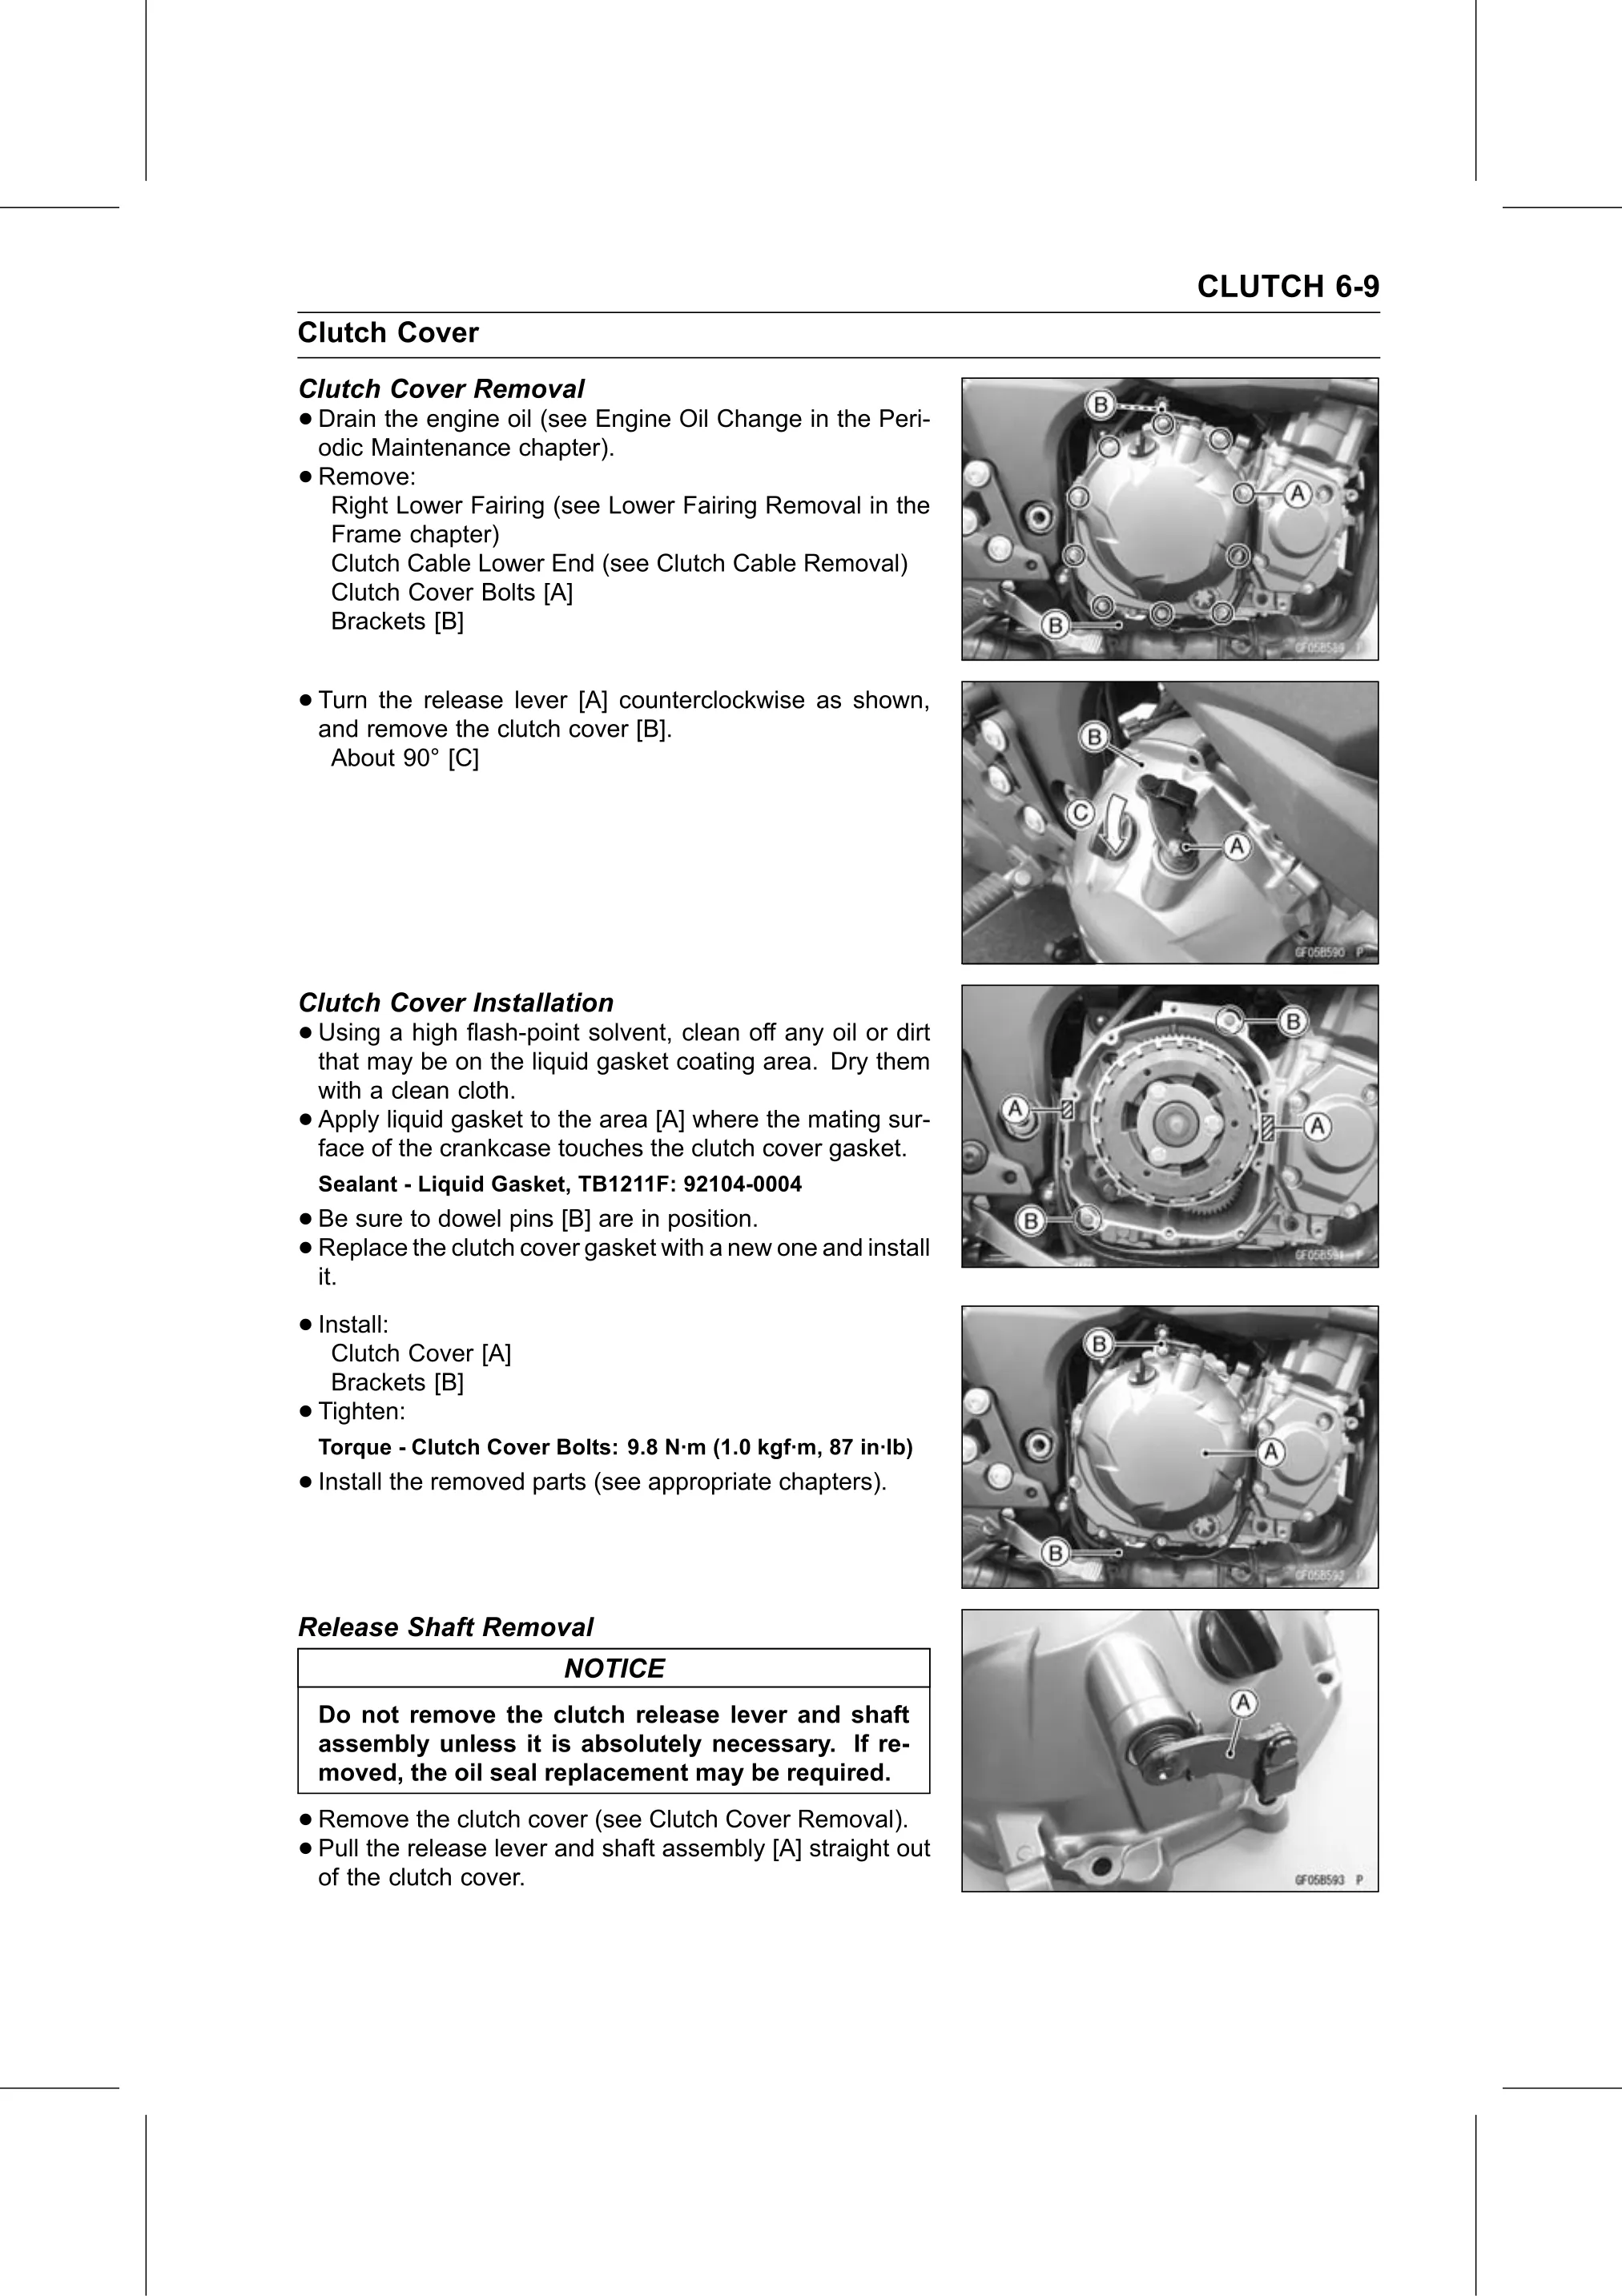
     Clutch Cover Bolts [A]
     Brackets [B]

• Turn the release lever [A] counterclockwise as shown,
  and remove the clutch cover [B].
     About 90° [C]

Clutch Cover Installation
• Using a high flash-point solvent, clean off any oil or dirt
  that may be on the liquid gasket coating area. Dry them
    with a clean cloth.
•   Apply liquid gasket to the area [A] where the mating sur-
    face of the crankcase touches the clutch cover gasket.
    Sealant - Liquid Gasket, TB1211F: 92104-0004
• Be  sure to dowel pins [B] are in position.
• Replace
  it.
           the clutch cover gasket with a new one and install

• Install:
   Clutch Cover [A]
     Brackets [B]
•   Tighten:
    Torque - Clutch Cover Bolts: 9.8 N·m (1.0 kgf·m, 87 in·lb)
• Install the removed parts (see appropriate chapters).

Release Shaft Removal
                           NOTICE
    Do not remove the clutch release lever and shaft
    assembly unless it is absolutely necessary. If re-
    moved, the oil seal replacement may be required.

• Remove    the clutch cover (see Clutch Cover Removal).
• of the clutch cover.
  Pull the release  lever and shaft assembly [A] straight out