Service Manual (KLZ1000C) — page 73 of 762
Periodic Maintenance › Brake Light Switch Operation Inspection
Text on this page
PERIODIC MAINTENANCE 2-51
Periodic Maintenance Procedures

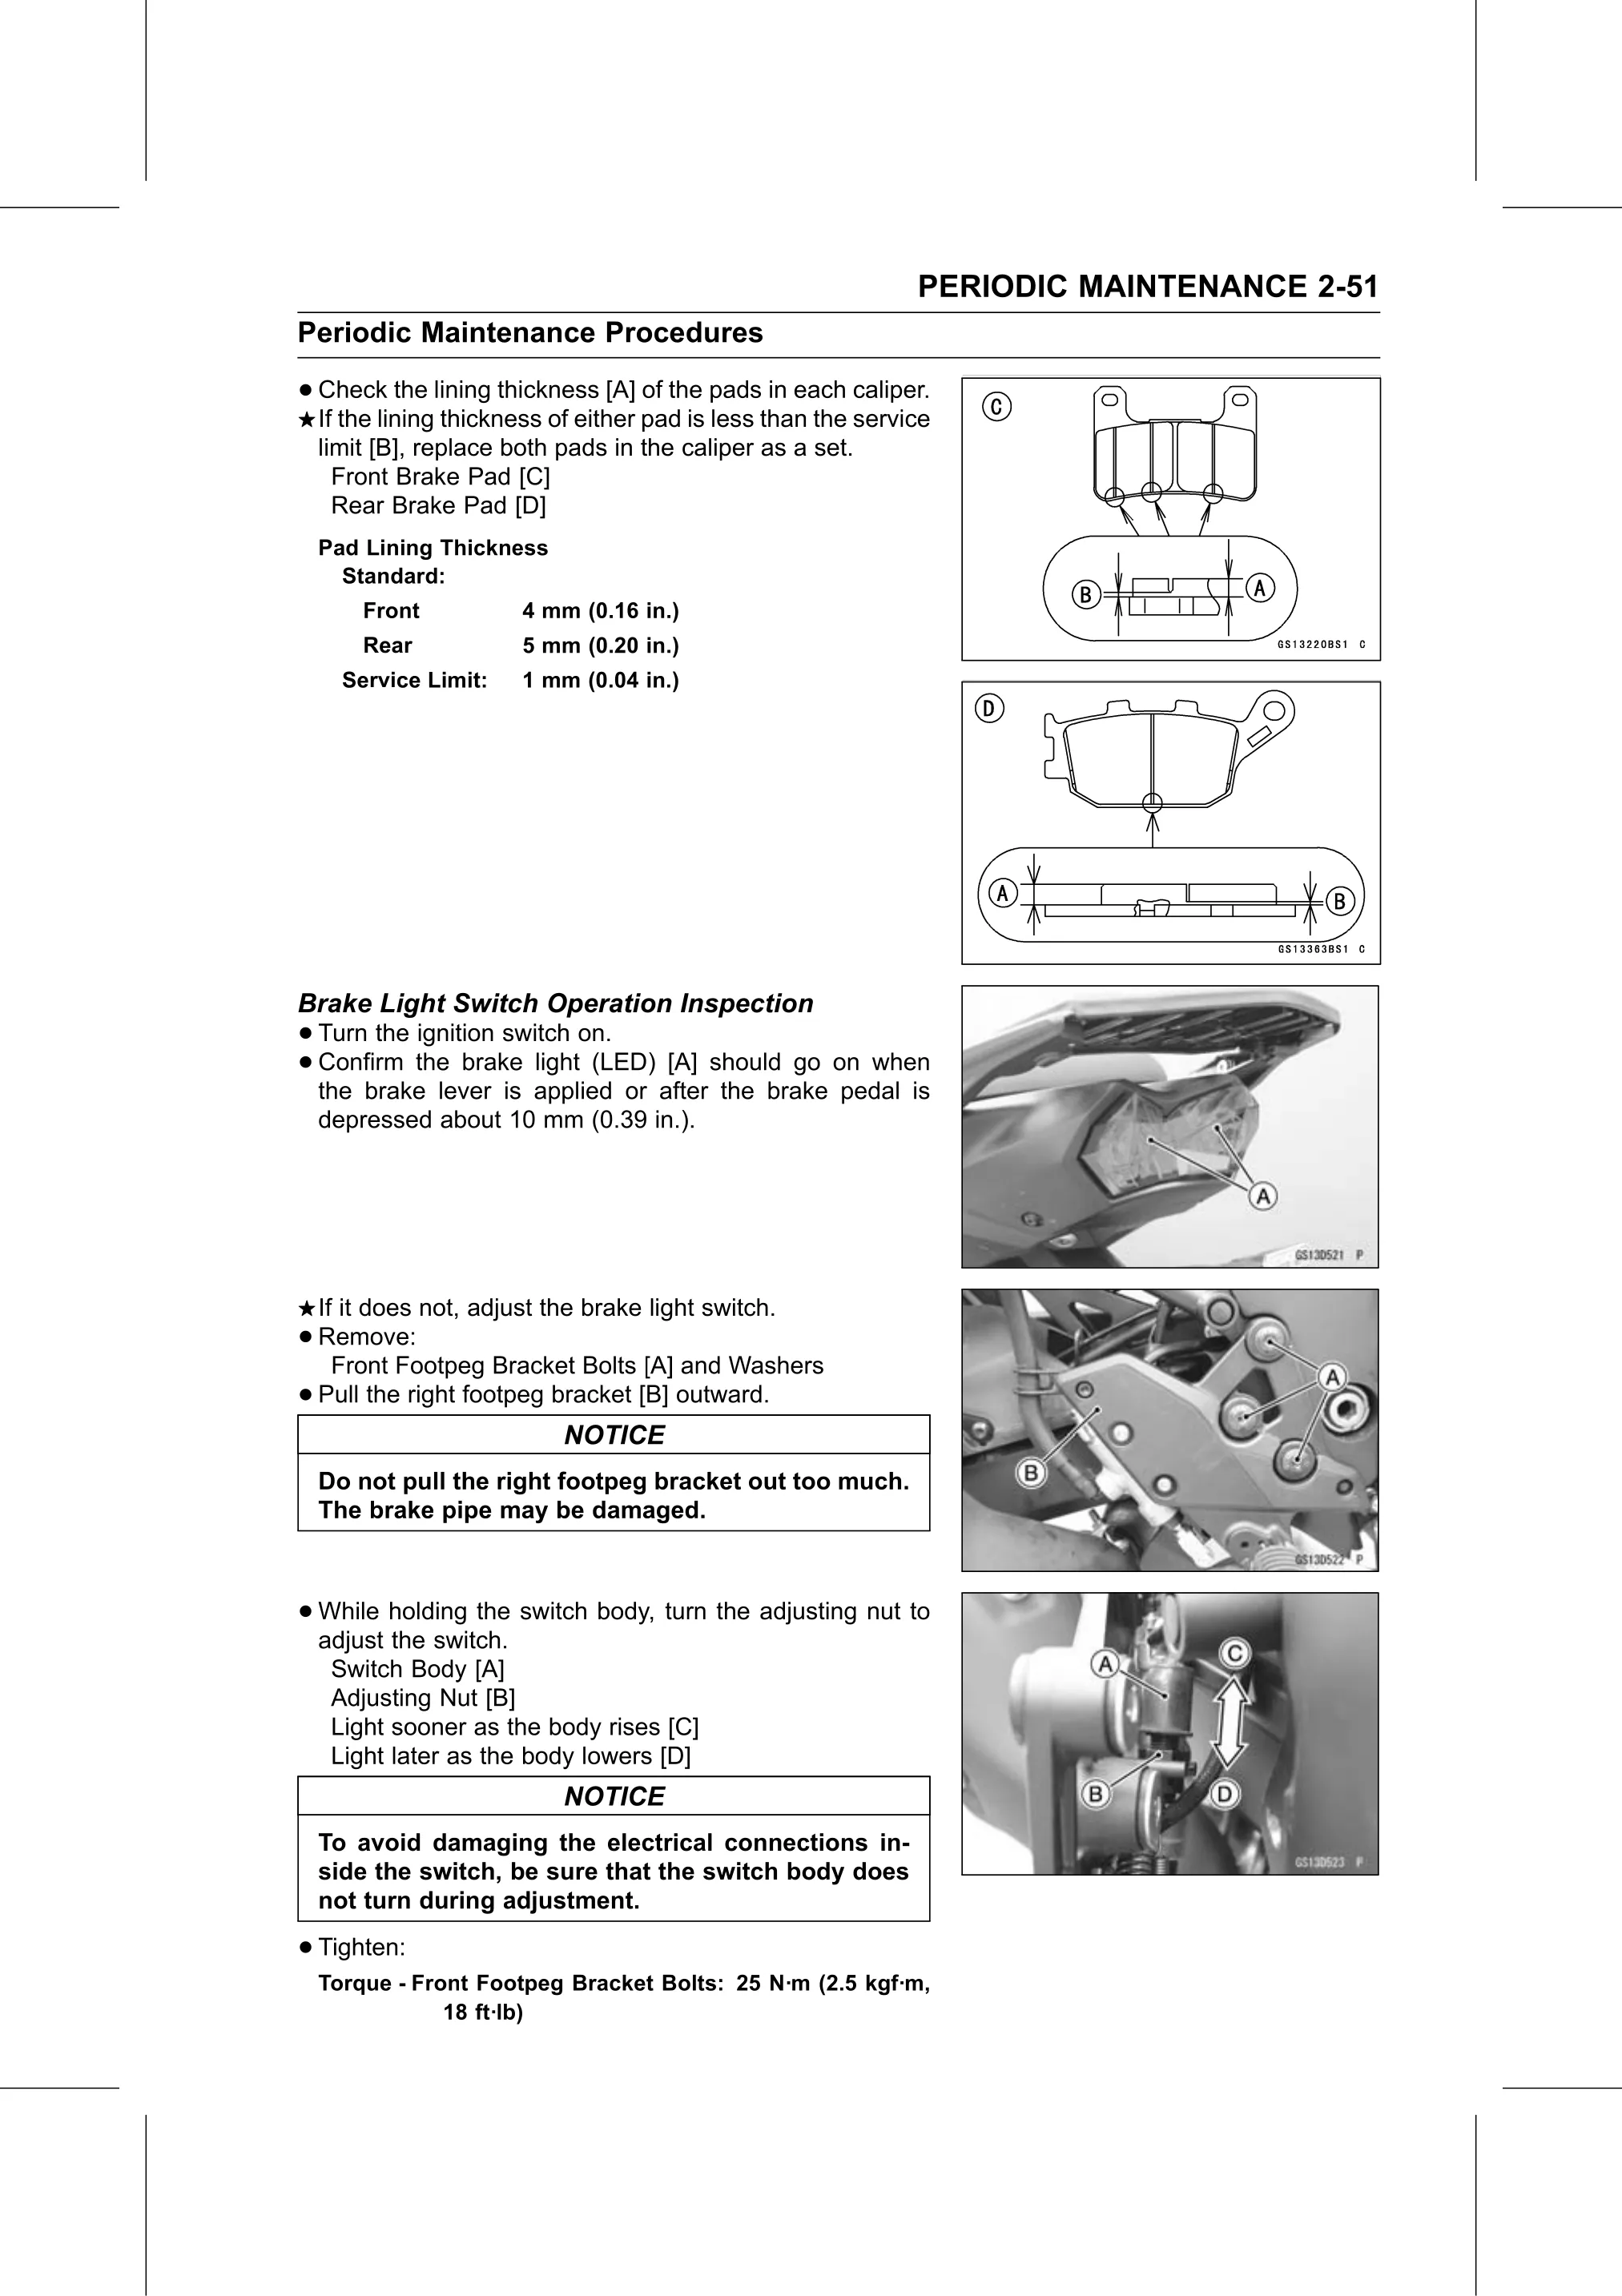
• Check    the lining thickness [A] of the pads in each caliper.
  If the lining thickness of either pad is less than the service
    limit [B], replace both pads in the caliper as a set.
      Front Brake Pad [C]
      Rear Brake Pad [D]
    Pad Lining Thickness
      Standard:
        Front           4 mm (0.16 in.)
        Rear            5 mm (0.20 in.)
      Service Limit:    1 mm (0.04 in.)

Brake Light Switch Operation Inspection
• Turn the ignition switch on.
• Confirm  the brake light (LED) [A] should go on when
  the brake lever is applied or after the brake pedal is
    depressed about 10 mm (0.39 in.).

    If it does not, adjust the brake light switch.
•   Remove:
      Front Footpeg Bracket Bolts [A] and Washers
•   Pull the right footpeg bracket [B] outward.
                            NOTICE
    Do not pull the right footpeg bracket out too much.
    The brake pipe may be damaged.

• While  holding the switch body, turn the adjusting nut to
  adjust the switch.
     Switch Body [A]
     Adjusting Nut [B]
     Light sooner as the body rises [C]
     Light later as the body lowers [D]
                            NOTICE
    To avoid damaging the electrical connections in-
    side the switch, be sure that the switch body does
    not turn during adjustment.

• Tighten:
    Torque - Front Footpeg Bracket Bolts: 25 N·m (2.5 kgf·m,
                18 ft·lb)