Service Manual (KLZ1000C) — page 350 of 762
Brakes › Brake Pedal Removal
Text on this page
12-10 BRAKES
Brake Lever, Brake Pedal
Brake Lever Position Adjustment
  The brake lever adjuster has 6 positions so that the brake
lever position can be adjusted to suit the operator’s hand.
• Push the lever forward and turn the adjuster [A] to align
  the number with the arrow mark [B] on the lever.
○The distance from the grip to the lever is minimum at num-
  ber 6 and maximum at number 1.

Brake Pedal Position Inspection
• Check  that the brake pedal [A] is in the correct position.
   [B] Footpeg
    Pedal Position
      Standard: About 48 mm (1.9 in.) [C] below top of
                   footpeg
    If it is incorrect, adjust the brake pedal position.

Brake Pedal Position Adjustment
                               NOTE
    ○Usually it is not necessary to adjust the pedal position,
      but always adjust it when the push rod locknut has been
      loosened.

• Loosen the locknut [A] and turn the push rod with the hex
  head [B] to achieve the correct pedal position.
    If the length [C] shown is 70 ±1 mm (2.76 ±0.04 in.), the
    pedal position will be within the standard range.
•   Tighten:
    Torque - Rear Master Cylinder Push Rod Locknut: 17 N·m
               (1.7 kgf·m, 13 ft·lb)
• Check  the brake light switch operation (see Brake Light
  Switch Operation Inspection(2-51)).
Brake Pedal Removal
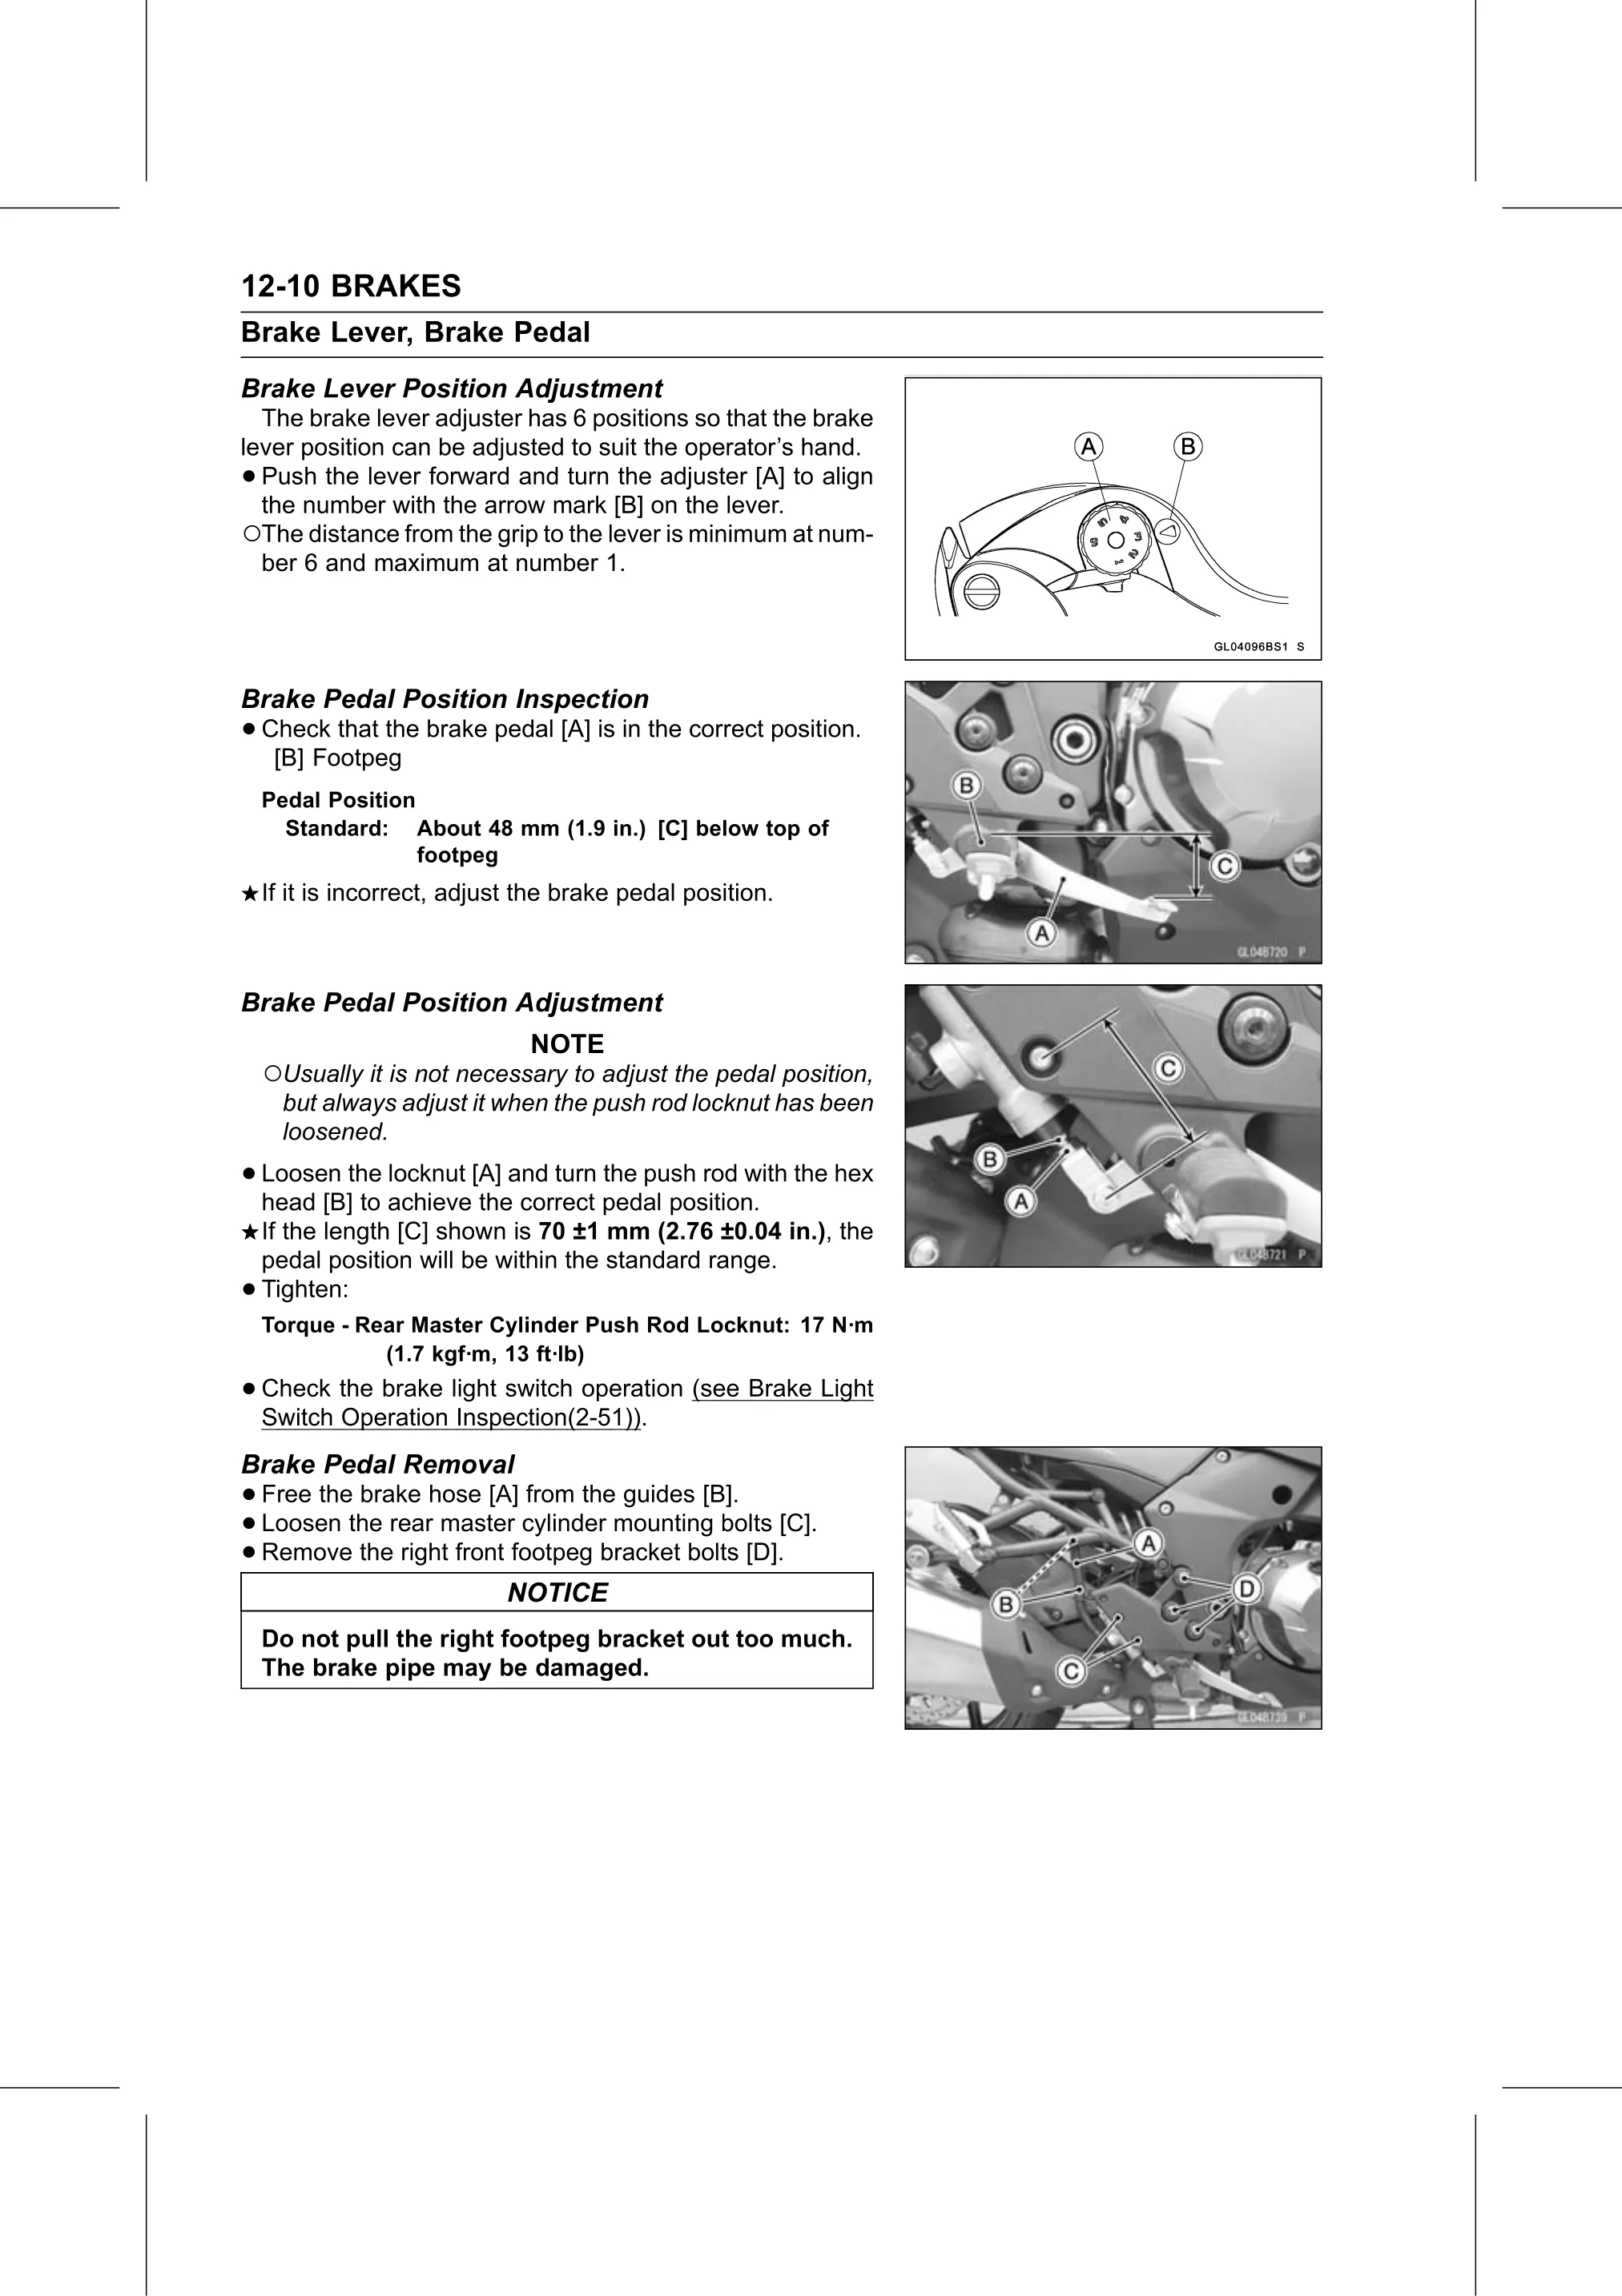
• Free the brake hose [A] from the guides [B].
• Loosen  the rear master cylinder mounting bolts [C].
• Remove   the right front footpeg bracket bolts [D].
                            NOTICE
    Do not pull the right footpeg bracket out too much.
    The brake pipe may be damaged.