Service Manual (KLZ1000C) — page 360 of 762
Brakes › Front Master Cylinder Installation
Text on this page
12-20 BRAKES
Master Cylinder
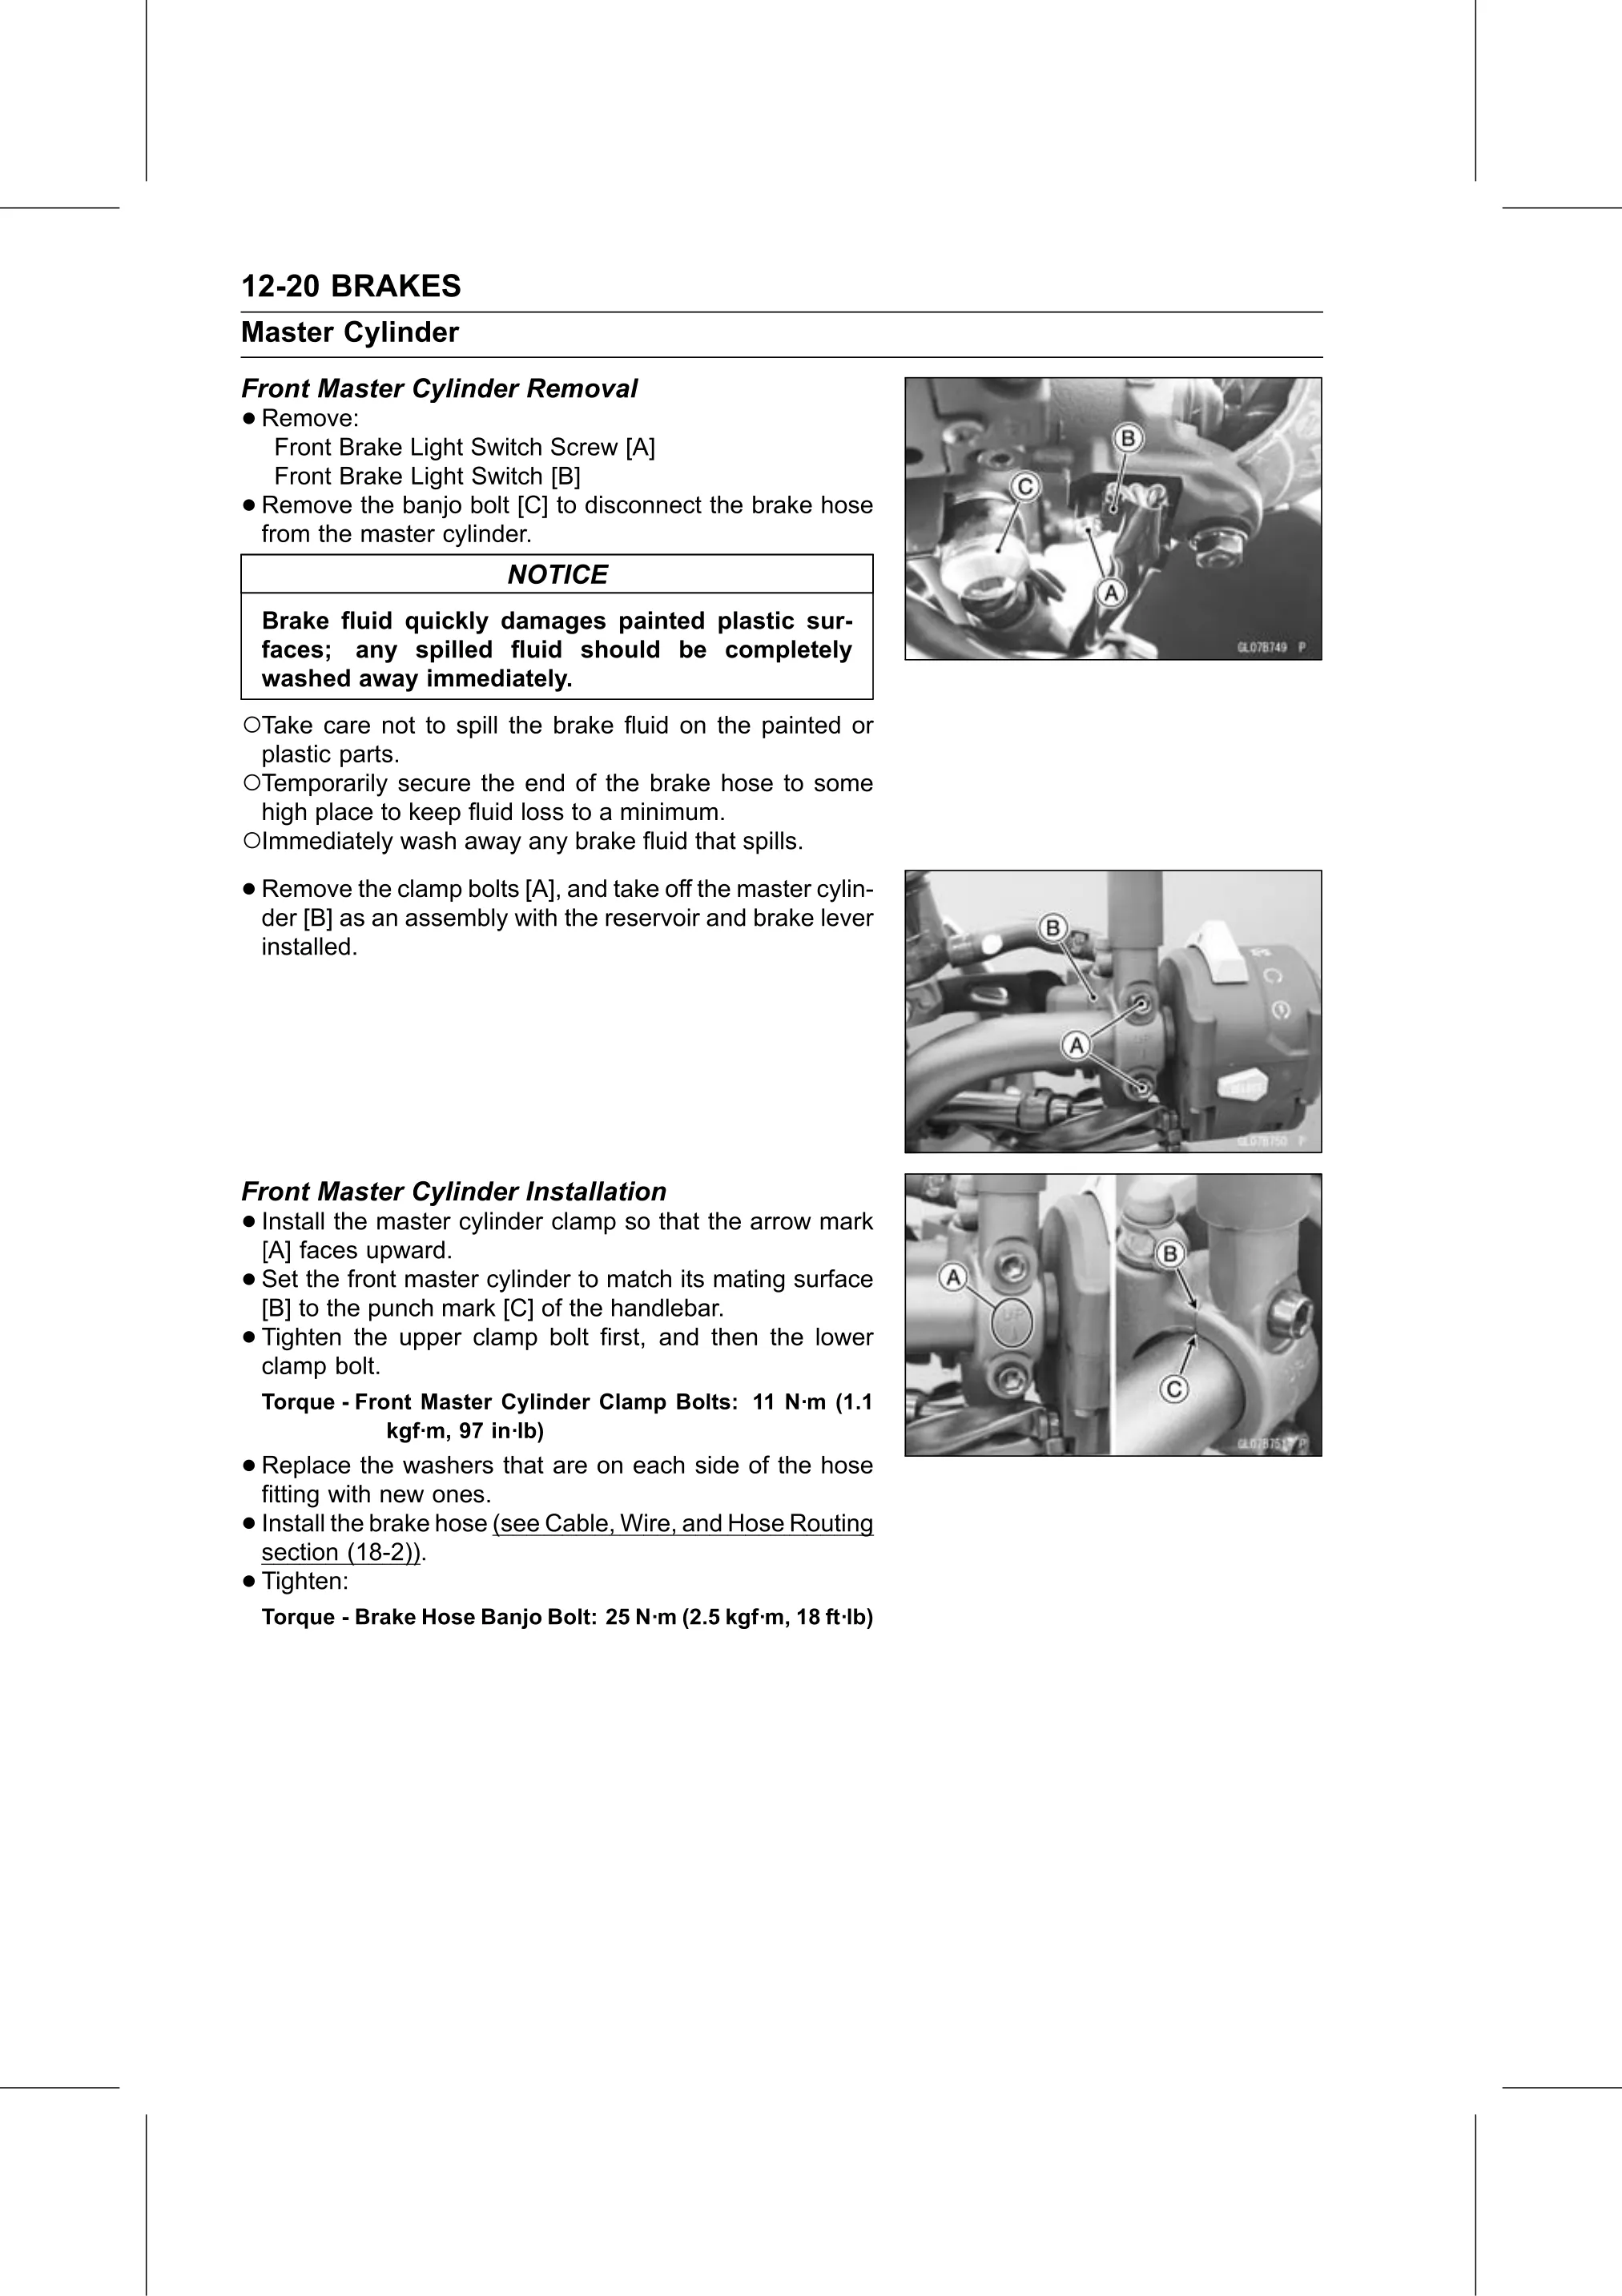
Front Master Cylinder Removal
• Remove:
   Front Brake Light Switch Screw [A]
      Front Brake Light Switch [B]
•   Remove the banjo bolt [C] to disconnect the brake hose
    from the master cylinder.
                            NOTICE
    Brake fluid quickly damages painted plastic sur-
    faces; any spilled fluid should be completely
    washed away immediately.
○Take care not to spill the brake fluid on the painted or
 plastic parts.
○Temporarily secure the end of the brake hose to some
 high place to keep fluid loss to a minimum.
○Immediately wash away any brake fluid that spills.
• Remove   the clamp bolts [A], and take off the master cylin-
  der [B] as an assembly with the reservoir and brake lever
    installed.

Front Master Cylinder Installation
• Install the master cylinder clamp so that the arrow mark
  [A] faces upward.
• Set  the front master cylinder to match its mating surface
  [B] to the punch mark [C] of the handlebar.
• Tighten   the upper clamp bolt first, and then the lower
  clamp bolt.
    Torque - Front Master Cylinder Clamp Bolts: 11 N·m (1.1
                kgf·m, 97 in·lb)
• Replace    the washers that are on each side of the hose
  fitting with new ones.
• Install the brake hose (see Cable, Wire, and Hose Routing
  section (18-2)).
• Tighten:
    Torque - Brake Hose Banjo Bolt: 25 N·m (2.5 kgf·m, 18 ft·lb)