Service Manual (KLZ1000C) — page 546 of 762
Electrical System › Turn Signal Relay Inspection
Text on this page
16-64 ELECTRICAL SYSTEM
Lighting System

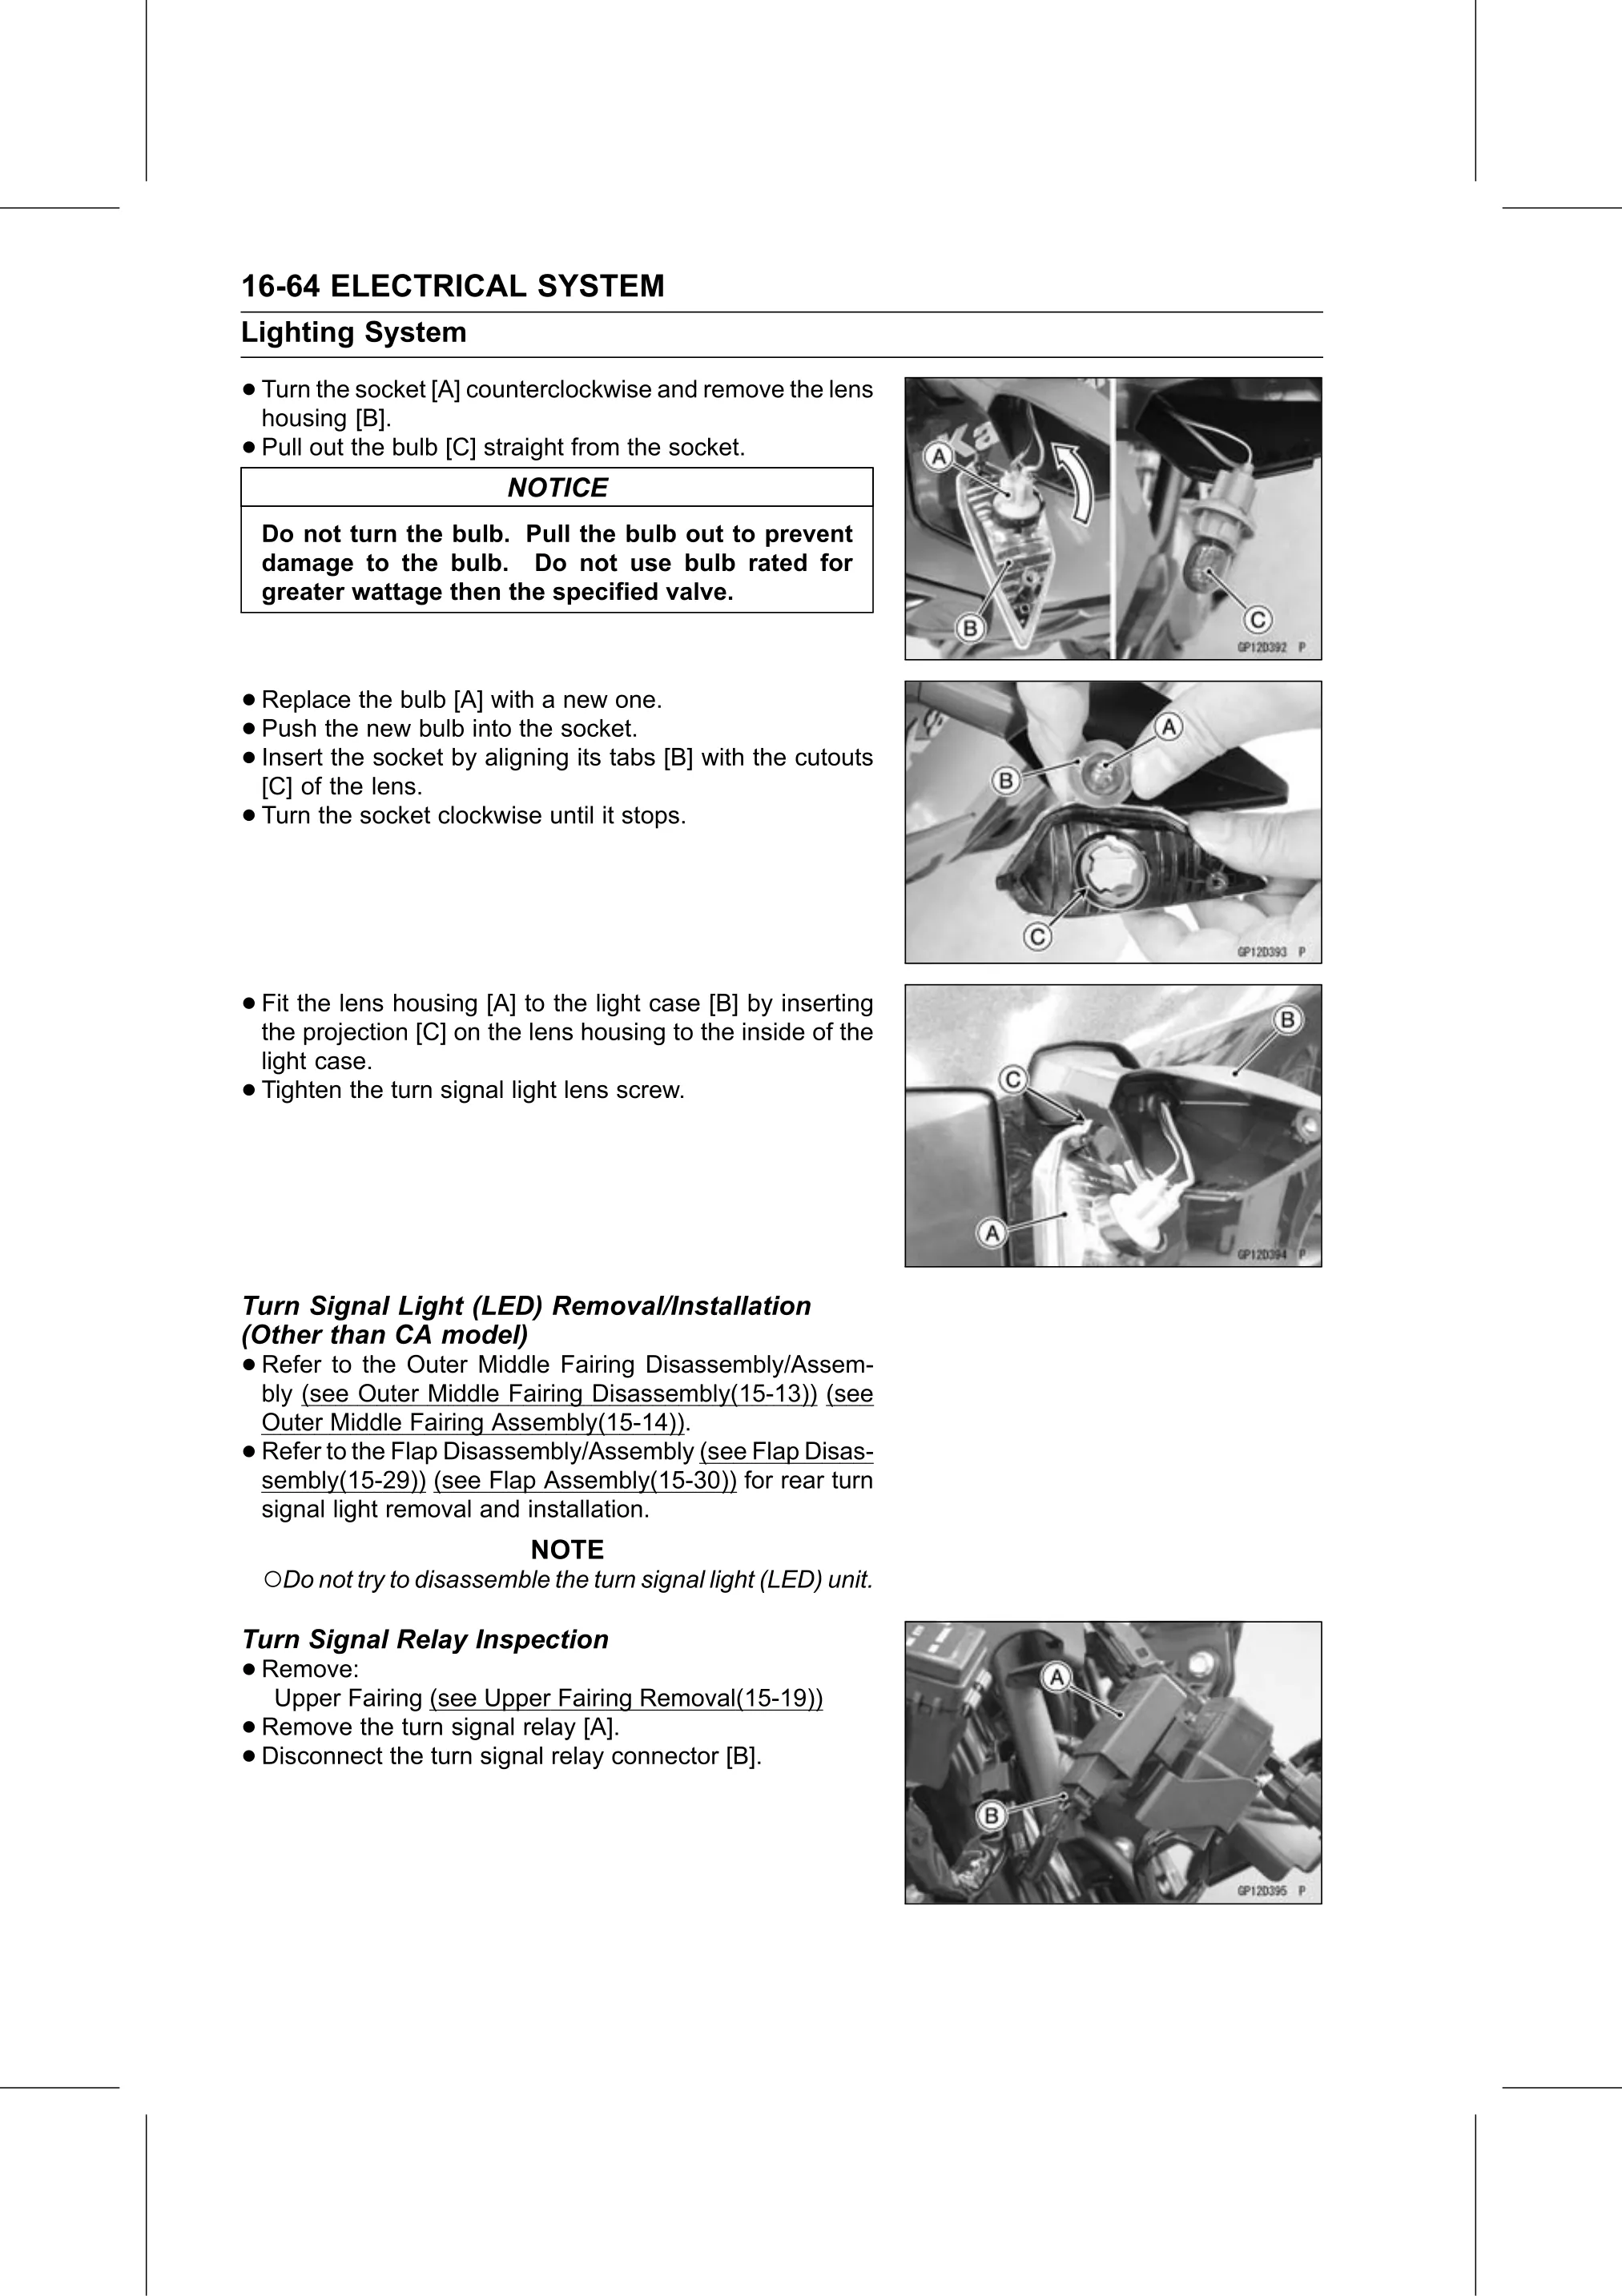
• Turn the socket [A] counterclockwise and remove the lens
  housing [B].
• Pull out the bulb [C] straight from the socket.
                            NOTICE
    Do not turn the bulb. Pull the bulb out to prevent
    damage to the bulb. Do not use bulb rated for
    greater wattage then the specified valve.

• Replace   the bulb [A] with a new one.
• Insert the new
  Push  the       bulb into the socket.
• [C] of the lens.
              socket by aligning its tabs [B] with the cutouts

• Turn the socket clockwise until it stops.

• Fit the lens housing [A] to the light case [B] by inserting
  the projection [C] on the lens housing to the inside of the
    light case.
•   Tighten the turn signal light lens screw.

Turn Signal Light (LED) Removal/Installation
(Other than CA model)
• Refer  to the Outer Middle Fairing Disassembly/Assem-
  bly (see Outer Middle Fairing Disassembly(15-13)) (see
    Outer Middle Fairing Assembly(15-14)).
•   Refer to the Flap Disassembly/Assembly (see Flap Disas-
    sembly(15-29)) (see Flap Assembly(15-30)) for rear turn
    signal light removal and installation.
                              NOTE
    ○Do not try to disassemble the turn signal light (LED) unit.
Turn Signal Relay Inspection
• Remove:
   Upper Fairing (see Upper Fairing Removal(15-19))
• Disconnectthetheturnturnsignal
  Remove                         relay [A].
•                            signal relay connector [B].