Service Manual — page 441 of 715
Brakes › Master Cylinder Assembly
Text on this page
BRAKES 12-19
Master Cylinder

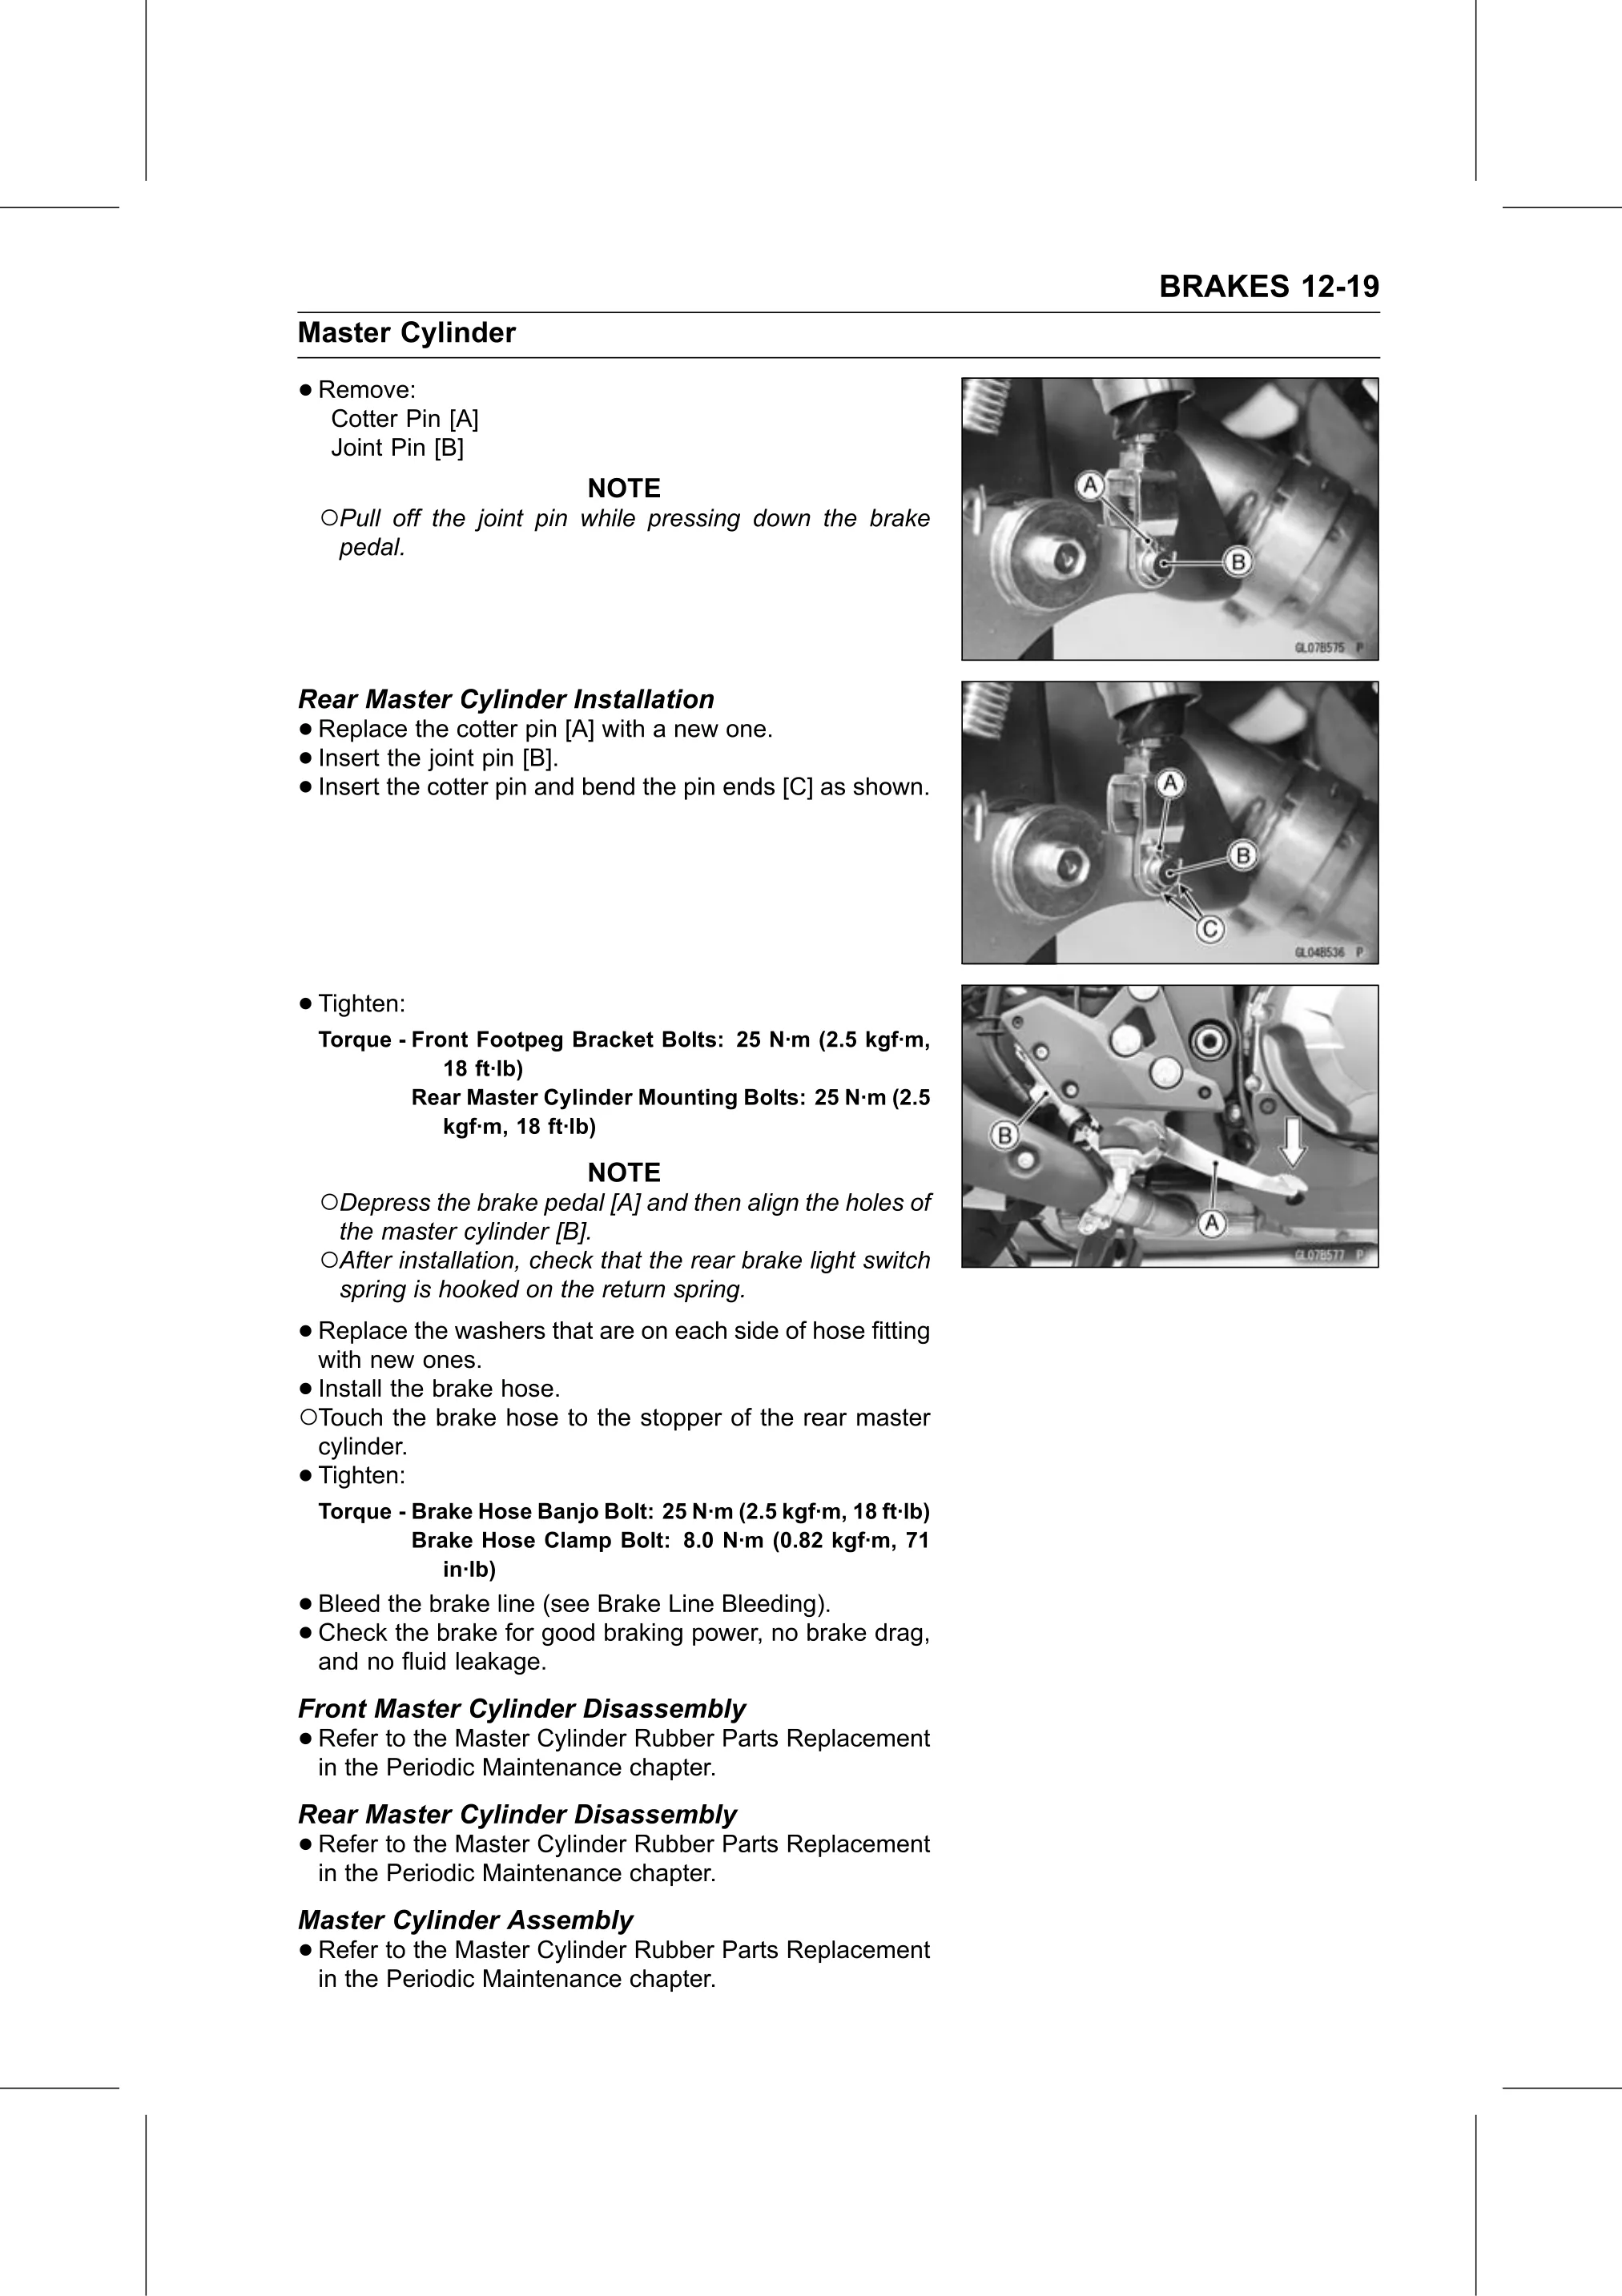
• Remove:
   Cotter Pin [A]
     Joint Pin [B]
                              NOTE
    ○Pull off the joint pin while pressing down the brake
      pedal.

Rear Master Cylinder Installation
• Replace   the cotter pin [A] with a new one.
• Insert the joint pin [B].
• Insert the cotter pin and bend the pin ends [C] as shown.

• Tighten:
    Torque - Front Footpeg Bracket Bolts: 25 N·m (2.5 kgf·m,
                18 ft·lb)
             Rear Master Cylinder Mounting Bolts: 25 N·m (2.5
                kgf·m, 18 ft·lb)

                              NOTE
    ○Depress the brake pedal [A] and then align the holes of
      the master cylinder [B].
    ○After installation, check that the rear brake light switch
      spring is hooked on the return spring.

• Replace   the washers that are on each side of hose fitting
  with new ones.
•○Install the brake hose.
  Touch the brake hose to the stopper of the rear master
    cylinder.
•   Tighten:
    Torque - Brake Hose Banjo Bolt: 25 N·m (2.5 kgf·m, 18 ft·lb)
             Brake Hose Clamp Bolt: 8.0 N·m (0.82 kgf·m, 71
                in·lb)
• Bleed the brake line (see Brake Line Bleeding).
• and nothe
  Check       brake for good braking power, no brake drag,
          fluid leakage.
Front Master Cylinder Disassembly
• Refer  to the Master Cylinder Rubber Parts Replacement
  in the Periodic Maintenance chapter.
Rear Master Cylinder Disassembly
• Refer  to the Master Cylinder Rubber Parts Replacement
  in the Periodic Maintenance chapter.
Master Cylinder Assembly
• Refer  to the Master Cylinder Rubber Parts Replacement
  in the Periodic Maintenance chapter.