Service Manual (KLZ1000C) — page 230 of 762
Clutch › Clutch Installation
Text on this page
6-16 CLUTCH
Clutch

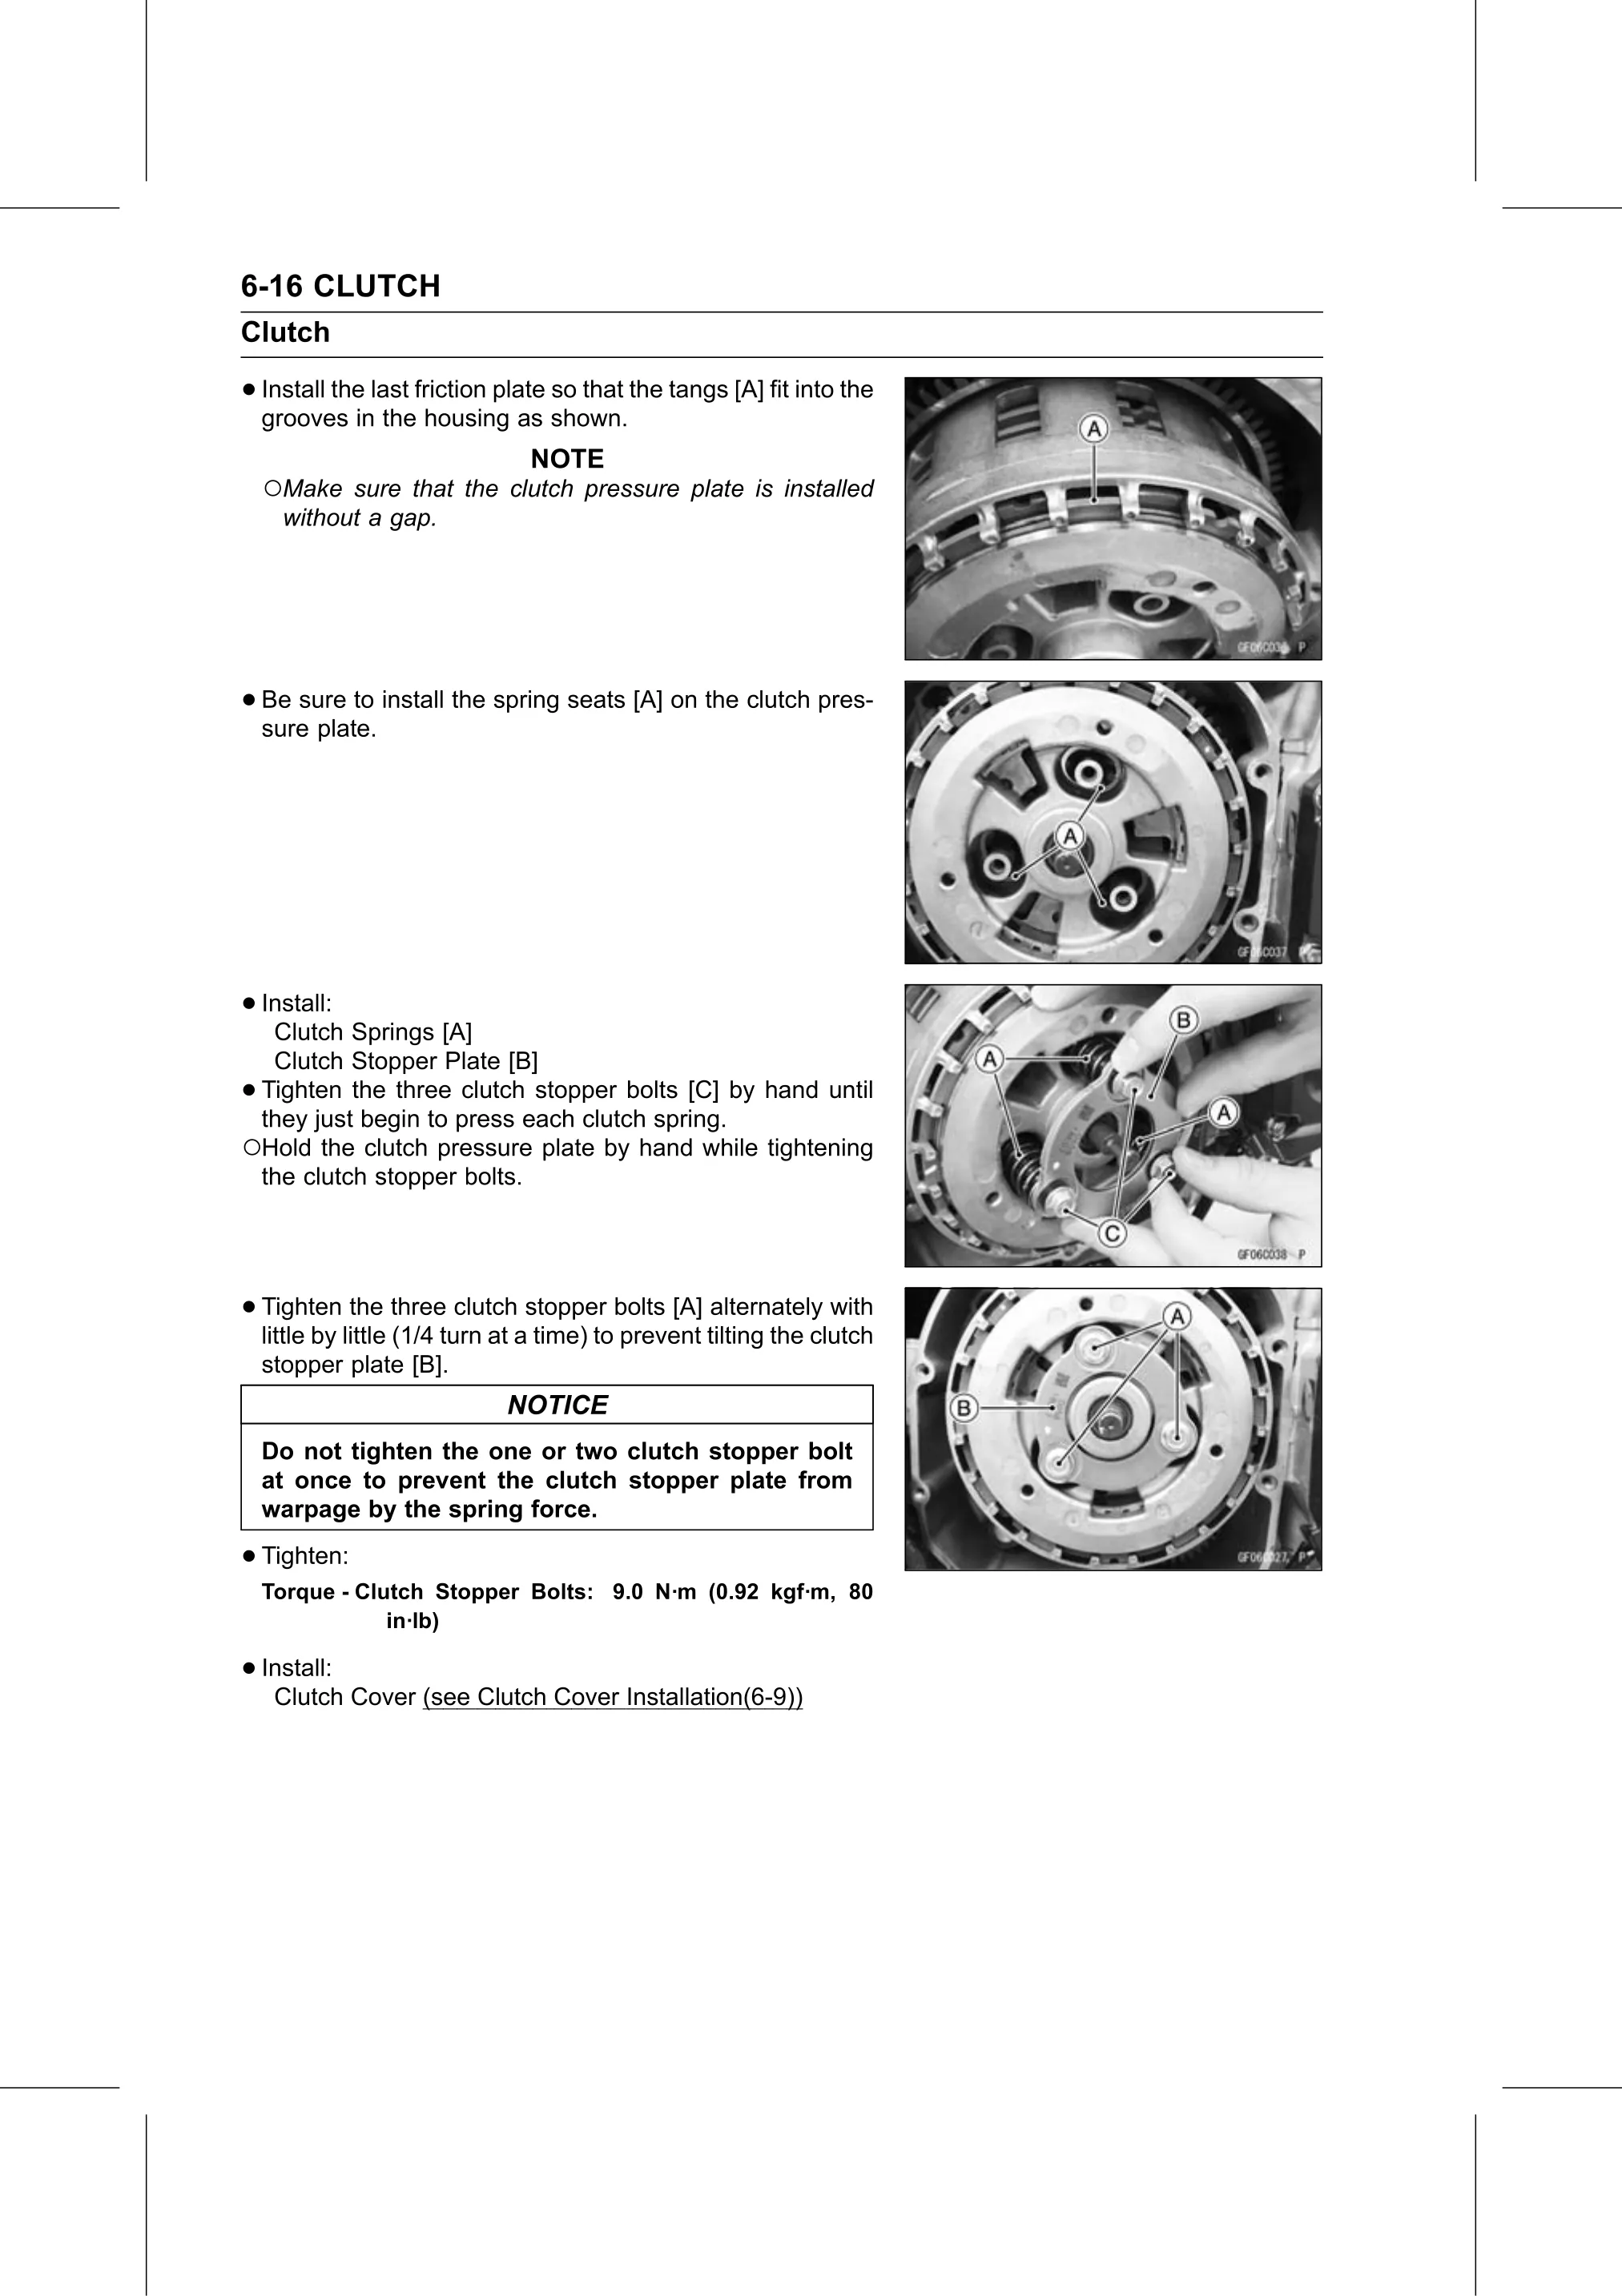
• Install the last friction plate so that the tangs [A] fit into the
  grooves in the housing as shown.
                               NOTE
    ○Make sure that the clutch pressure plate is installed
     without a gap.

• Be sure to install the spring seats [A] on the clutch pres-
  sure plate.

• Install:
   Clutch Springs [A]
  Clutch Stopper Plate [B]
•Tighten the three clutch stopper bolts [C] by hand until
 they just begin to press each clutch spring.
○Hold the clutch pressure plate by hand while tightening
 the clutch stopper bolts.

• Tighten    the three clutch stopper bolts [A] alternately with
  little by little (1/4 turn at a time) to prevent tilting the clutch
    stopper plate [B].
                             NOTICE
    Do not tighten the one or two clutch stopper bolt
    at once to prevent the clutch stopper plate from
    warpage by the spring force.

• Tighten:
    Torque - Clutch Stopper Bolts: 9.0 N·m (0.92 kgf·m, 80
                in·lb)

• Install:
   Clutch Cover (see Clutch Cover Installation(6-9))