Service Manual (KLZ1000C) — page 476 of 762
Frame › Rear Footpeg Bracket Installation
Text on this page
15-32 FRAME
Frame
Rear Footpeg Bracket Removal
• Remove the rear fender (see Flap and Rear Fender Re-
moval(15-28))
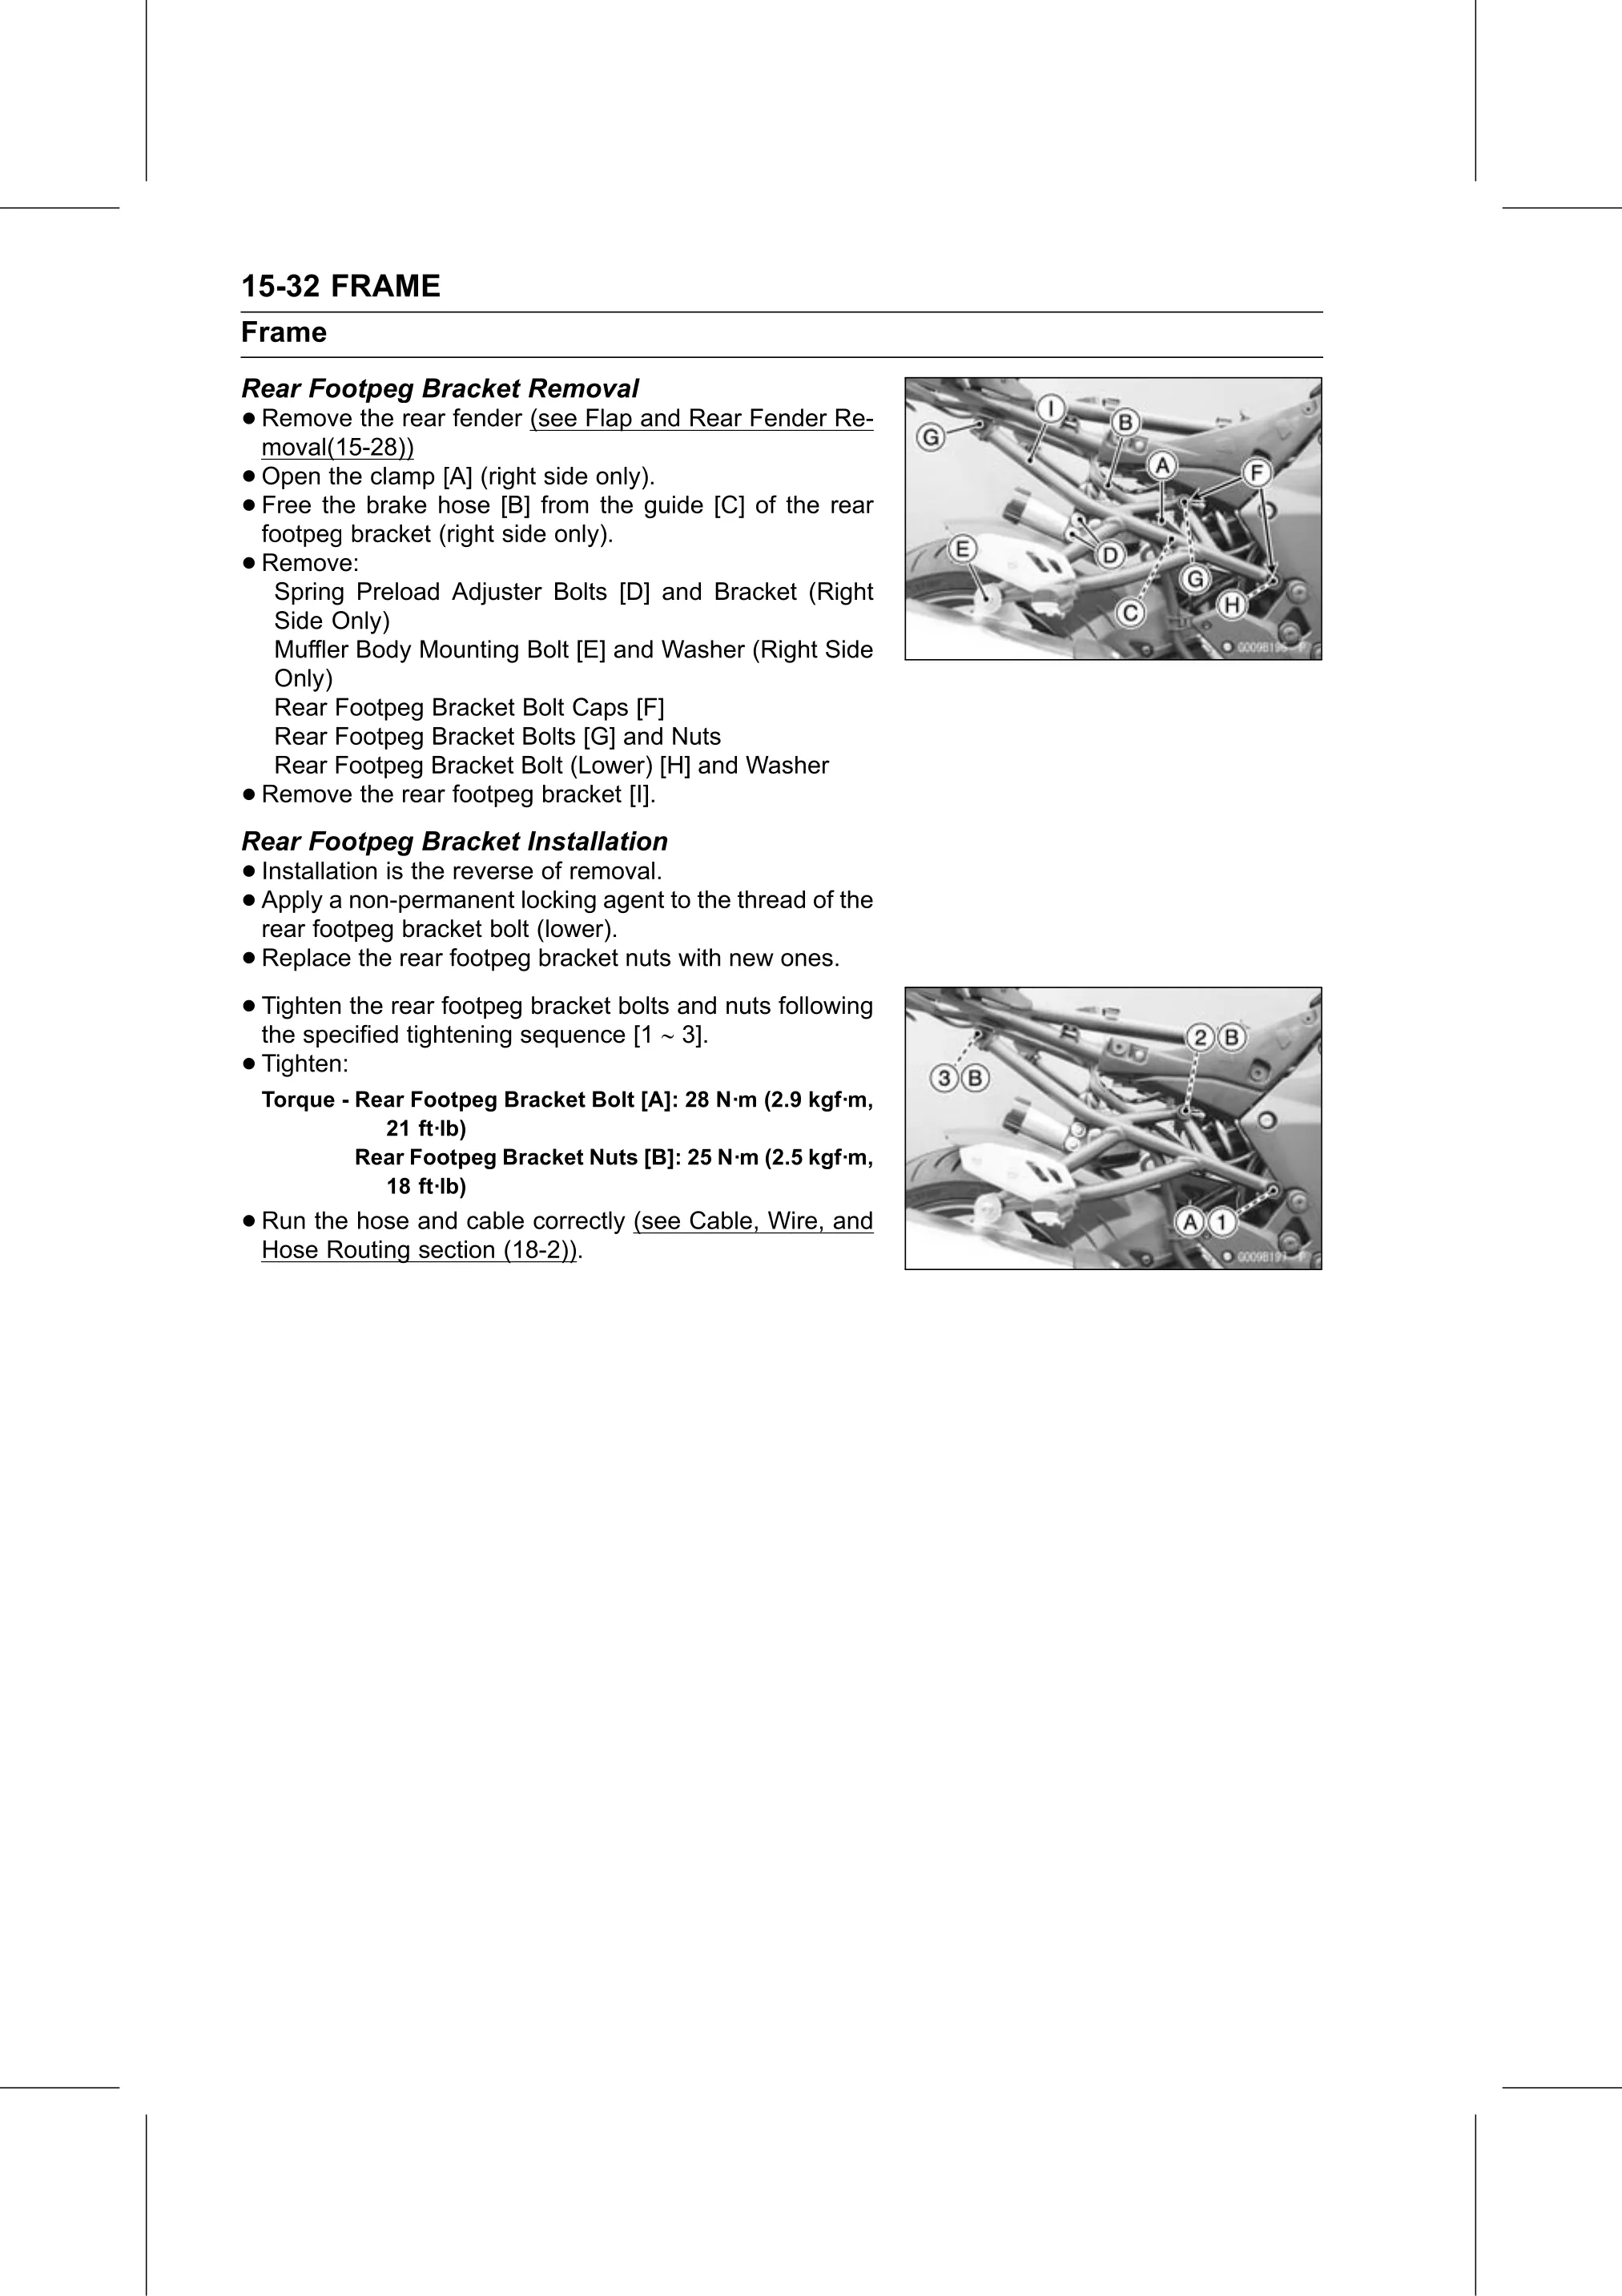
• Open the clamp [A] (right side only).
• footpeg bracket
Free the brake hose [B] from the guide [C] of the rear
(right side only).
• Remove:
Spring Preload Adjuster Bolts [D] and Bracket (Right
Side Only)
Muffler Body Mounting Bolt [E] and Washer (Right Side
Only)
Rear Footpeg Bracket Bolt Caps [F]
Rear Footpeg Bracket Bolts [G] and Nuts
Rear Footpeg Bracket Bolt (Lower) [H] and Washer
• Remove the rear footpeg bracket [I].
Rear Footpeg Bracket Installation
• Installation is the reverse of removal.
• Apply a non-permanent locking agent to the thread of the
rear footpeg bracket bolt (lower).
• Replace the rear footpeg bracket nuts with new ones.
• Tighten the rear footpeg bracket bolts and nuts following
the specified tightening sequence [1 3].
• Tighten:
Torque - Rear Footpeg Bracket Bolt [A]: 28 N·m (2.9 kgf·m,
21 ft·lb)
Rear Footpeg Bracket Nuts [B]: 25 N·m (2.5 kgf·m,
18 ft·lb)
• Run the hose and cable correctly (see Cable, Wire, and
Hose Routing section (18-2)).